|
|
Post by Checkmate! on Aug 10, 2006 15:01:52 GMT 8
|
|
|
|
Post by Checkmate! on Jul 26, 2006 11:03:46 GMT 8
this is what i am working on a 1/100 Duel Gundam as in just the Duel with no AS. This is still unfinished no decals, panel lines and flat coat. Sorry for the poor photography     wow so that's the color scheme you used on your duel. i liked it more better when it was just primed, grey! ;D j/k very smooth, darn wish i got that kind of a/b/ skills. . .  nice! very neat! iba talaga pag flat. good job pards. |
|
|
|
Post by Checkmate! on Jul 17, 2006 10:01:45 GMT 8
   Poor RX-79. bike's too small for him. * Update: test fitted the front wheel. steel working on the cowling. kaba kaba. |
|
|
|
Post by Checkmate! on Jul 17, 2006 9:21:35 GMT 8
Checkmate!nyahahha naging mini big bike sya for the gundam g, if you finished the bike let the gundam g take it for a ride! ;D and by the way, you eating green mangoes ba?  nyahahaha i can see an almost empty bottle of bagoong. hekhekhek. Actually that bottle of bagoong is where i dump my used paint and spray the left overs. nangasim tuloy ako a. ;D |
|
|
|
Post by Checkmate! on Jul 16, 2006 14:36:06 GMT 8
Checkmate!
astig!!!  cool updates bro. envy... envy... envy... ;D cool updates bro. envy... envy... envy... ;D Thanks pards. Next step will be placing the decals. I really hate this step. one mistake and all of the hard work i did on the kit will go to waste.  |
|
|
|
Post by Checkmate! on Jul 16, 2006 3:03:23 GMT 8
|
|
|
|
Post by Checkmate! on Jul 15, 2006 12:00:09 GMT 8
try to put a gundam character on that biek and post some pics. . . so you'll not be off topic honga no. OK. i'll post pics tom with a Gundam part or something. LOL. |
|
|
|
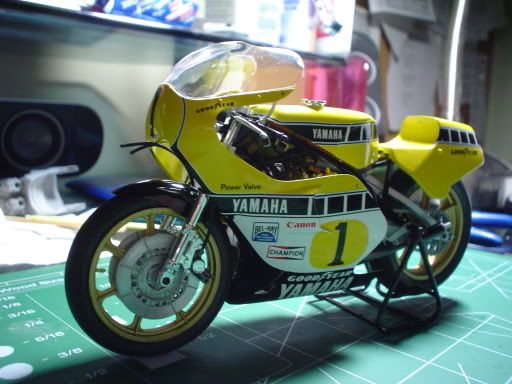
Post by Checkmate! on Jul 15, 2006 11:38:07 GMT 8
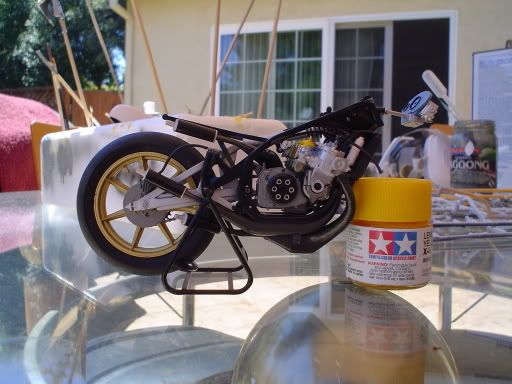
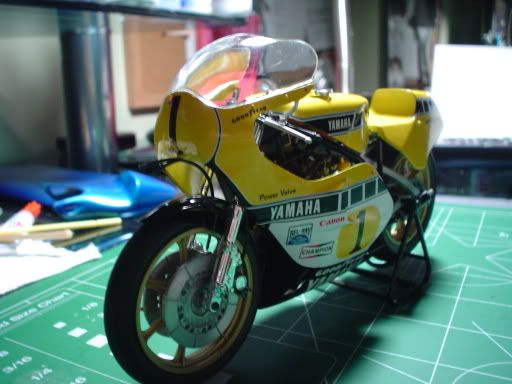
looks great Vic! looks tasty too ( white chocolate). : ) Here's an update on my Yamha bike. I hope you don't mind that i'm posting non Gundam photos. kasi we really don't have any specific thread for non-Gundam kits so dito na lang.  side view of the front wheel and fork.  another shot. i really like how the front fender came out so shiny. no polishing needed.  i airbrushed the insides of the cowling flat black 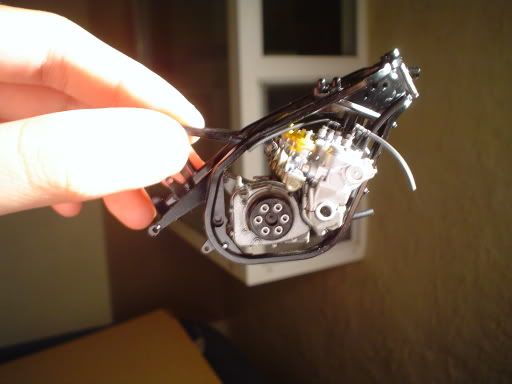 engine with chassis |
|
|
|
Post by Checkmate! on Jul 10, 2006 15:36:37 GMT 8
Checkmate!oh my bad, didn't notice your location, ;D sorry. . . no problem pre. |
|
|
|
Post by Checkmate! on Jul 9, 2006 3:26:35 GMT 8
ey if you dont have that much time to built your mg kits, just ask, i'll built i for you Thanks pre. tempting offer but the shipping cost will kill my wallet alone. |
|
|
|
Post by Checkmate! on Jul 8, 2006 12:49:53 GMT 8
Checkmate!it;s the same with mg kits, you spent a lot of time building the internal frames of the mechs then it will just be covered with the armor! ;D but really you did a great job with that engine. . . wow! thanks! That's why i did'nt bother to detail my INGRAM's internal parts. Maybe after this kit i'll work on my other MG's. sana sipagin. LOL. |
|
|
|
Post by Checkmate! on Jul 8, 2006 11:26:17 GMT 8
Seele01:
Thanks. i used chrom silver by Model Master (metalizer line) on the carburetors. Other than that all of the shades are Tamiya acrylics.
archaznable:
Thanks!
Vic01:
Nice job on the kit pre. What did you use to paint the pipes? hand brush? I recently discovered a nice brush to be used on detailing. It's called a micro brush. try it if you have'nt. pasmado kasi ako kaya i can't use the regular paint brush. : (
p.s. Vic i hope you're not painting indoors ha.
|
|
|
|
Post by Checkmate! on Jul 8, 2006 10:05:48 GMT 8
vic01
hey bro, cool update on the Zeta leg. nice details.
Checkmate!
whoa! great details on the engine. guess it's a time-consusing piece. right, bro? still, a great engine.  Thanks! Yep. very time consuming nga. I'll be spending like 70% of my time on the engine but in the end it gets covered by the bikes cowling. |
|
|
|
Post by Checkmate! on Jul 8, 2006 8:51:09 GMT 8
Eto naman sa akin: Yamaha YZR 500 Kenny Roberts Sr. 80% of the engine ;D     |
|
|
|
Post by Checkmate! on Jan 21, 2006 6:38:17 GMT 8
Astray Red Frame 1/100   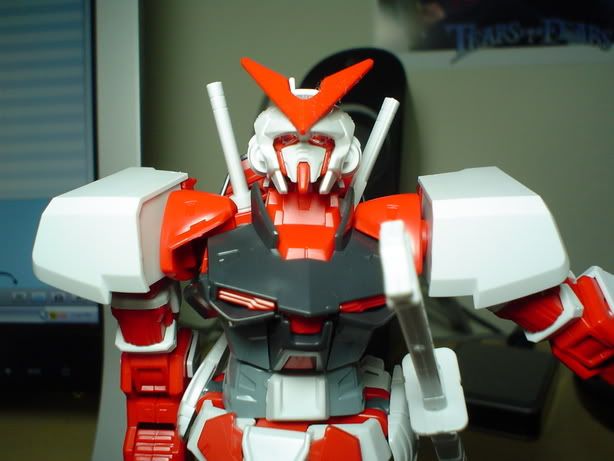 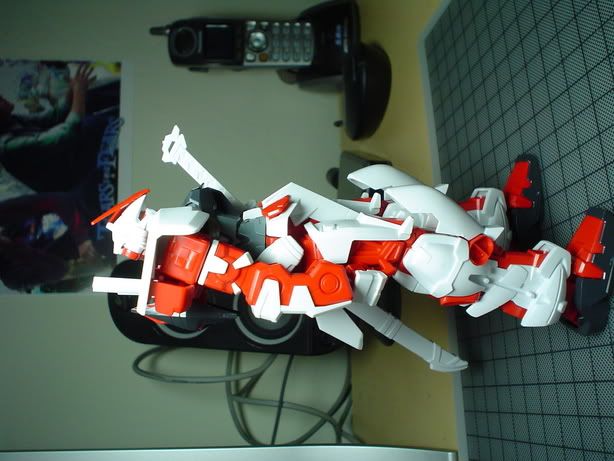 Inassemble ko pa lang. actually this will be my 2nd Astray Red kit na. Yung una tinamad ako tapusin and di ko gusto yung paint app. ko. Next step for this kit naman e priming and some gap filling. |
|


 nyahahaha i can see an almost empty bottle of bagoong.
 cool updates bro. envy... envy... envy... ;D