|
|
Post by Lady Commander on Jun 16, 2008 11:11:52 GMT 8
|
|
|
|
Post by Lady Commander on Jun 16, 2008 11:30:24 GMT 8
Lotur and to every1 u need wood for the base kinda heavy though. thats y used cardboard foam. u need cement. (casting plaster, composite cement, potting cement etc.) u can use all of them to make rocks and mountain edge.. i used composite cement because its kinda light weight and unbreakable. it wont break if u drop it. but takes 24hrs to dry. quick dry is casting plaster. u need cutter, glue. (elmer's glue or u can get plastic glue.. dont know the name. u need tiny rocks. real tiny. and grass sprinkle.. news papers and tape. . Step wood base or card board foam. the size will dpnding on ur desire. Step2 get ur news papers. crmple it and tape is n ur base. like what i did. (thats for bumpy terrain.) but if u want flat terrain u dont need it. 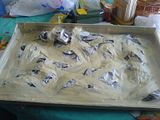 Step3 (easier way to make a terrain land texture is to use a cement plaster) but for me i like cementing it. cement ur base that wll become your terrain. ( before u do that make sure you already know what style of terrain u want.) but its ok not to cement it.. if u want just a flat one. now let it dry 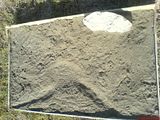 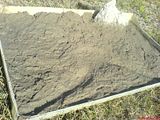 and if u use the cast plaster itll look like this (white in colour)and you'll need a paint to make it realistic. 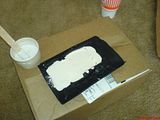 Step4 for your lil clif or mountain. get your mold and cement it. or u can make one by urslf if u dont have a molder. let it dry and make sure its hard enough. 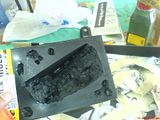 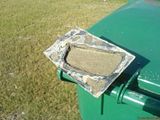 Step5 Paint your rocks, mountain edge or cliff and etc. for that i used yellow+brown+black color. 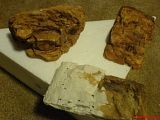 step6 brush your main base (terrain) with a glue any kind of liquid glue. sprinkle your grass or sand. let it dry.   step7 put it all together. trees,moutain etc.. step8 final touch up. now your done.. hope u can understand my messy instruction.. am not good in giving instructions thru writings.. hahahahha. sorry. and for the trees, its a diff story.. hahahahhaha.. u can get a real one from a branch or a tree or buy one and make one. (connecting the leaves and the tree.)
|
|
|
|
Post by DangerClose on Jun 16, 2008 11:32:20 GMT 8
Nice, looking real good so far. Can't wait to see it finished!
|
|
|
|
Post by miasong on Jun 16, 2008 12:30:12 GMT 8
Nice detailed procedure on how to make dios... I missed making one in my drafting lessons way back in highschool.. hehe ;D
|
|
|
|
Post by RainerO on Jun 16, 2008 12:42:03 GMT 8
Great pics and very detailed on how to make a terrain for a diorama, kudos to you ma'am!
|
|
|
|
Post by Lady Commander on Jun 17, 2008 11:27:30 GMT 8
|
|
|
|
Post by Lady Commander on Jun 17, 2008 11:27:48 GMT 8
|
|
|
|
Post by Vlad on Jun 18, 2008 7:20:26 GMT 8
Wow very detailed dios, it kinda reminds me of my Science class during elementary where we make dios as our projects btw, I like the shot w/ the powered GM, looks like he is going to stalk an enemy MS
|
|
|
|
Post by Lady Commander on Jun 18, 2008 12:24:08 GMT 8
|
|
|
|
Post by Lotur on Jun 18, 2008 13:11:24 GMT 8
thanks for the detailed procedure 'nelle!  great job on the diorama, galing!  |
|
|
|
Post by miasong on Jun 18, 2008 13:55:09 GMT 8
A+!! That's a cool finish! I'm really impressed 
|
|
|
|
Post by RainerO on Jun 18, 2008 17:33:50 GMT 8
Looks realistic, awesome!
|
|
|
|
Post by zankuro on Jun 18, 2008 19:02:41 GMT 8
Very nice!
|
|
|
|
Post by Lady Commander on Jun 19, 2008 4:05:53 GMT 8
thanks for the detailed procedure 'nelle!  great job on the diorama, galing!  A+!! That's a cool finish! I'm really impressed  Looks realistic, awesome! muchas gracias evey1 was planning to make another one "river bank scene or sea shore scene" but if i do. i wont be able to build my pending model kits.. hehehehe.. till next time! |
|
|
|
Post by qb on Jun 19, 2008 4:13:58 GMT 8
cool.... and it even comes with instructions.  |
|