Post by E_Wing on Jul 10, 2011 23:55:25 GMT 8
Kit: XXXG-01W Wing Gundam (Endless Waltz version)
Scale: non-scale
Grade: Super Deformed BB Soldiers
SD #: 366
Series: Shin Kidō Senki Gundam Wing: Mugen no Warutsu (New Mobile Report Gundam Wing: Endless Waltz)
Release date: June 9, 2011
Price: ¥840 (inclusive of tax)
Number of Parts:
76 plastic parts
- 64 Polystyrene (PS)
- 12 Polyethylene (PE)
foil stickers
Total Number of Runners: 5 + polycaps
Polycap Number: PC-303
Approximate Plastic Colors: White, Light Blue, Red, Yellow, Gray, Clear Blue
Weapons and Accessories:
Buster rifle x1 (handheld when in use; stored at the shield tip when transformed)
Shield x1 (stored at the back of the head when transformed)
Energy Capacitor storage unit x2 (each with Energy Capacitors x3)
Clear stand base
Kit Gimmicks:
Transformation to “Bird Mode”.
Inclusion of a clear stand base.
Internal head detail.
Original SD feature.
“Snap off” construction (making side cutters optional).
Use of a completely new polycap set which increases the articulation compared to the previous SD 00 kits and making it at par with the older SD SEED kits.
Compatibility with Action Bases 1, 2, and 3, and as well stands from most 1:144 and SD kits.
HISTORY:
The design of this kit (as well as the MG ver. Ka and its EW re-release) is the “improved” (slightly modified) version of Hajime Katoki’s redesign of the XXXG-01W Wing Gundam following with his redesign of the XXXG-00W0 Wing Gundam Zero for the OVA/movie “Gundam Wing Endless Waltz” (and later for the various Endless Waltz spin-offs and continuities). Like the original design for the TV series, this design still employs most of the original’s basic characteristics and weaponry, including the “Bird Mode” transformation. But unlike the original, this redesign also features new characteristics, such as its sleek design, simpler transformation, and the inclusion of two, three-piece E-Pac bundle modules which gives the buster rifle’s severely-limited shots with more ammunition. The only differences between Katoki’s original redesign (later used in the 1:144 and 1:100 resin conversion kits and as a secret unit in the 2nd Super Robot Wars Alpha) and his subsequent redesign are some color scheme variations (E-Pacs, certain portions on the wings and shield), the (originally overlapping) angled section at the rear area of the wing, and the inclusion of a domed section on the rear cover of the rifle and the second E-Pac bundle.
This kit’s release is due to the promotion of the Endless Waltz sequel entitled “Frozen Teardrop” (note the Endless Waltz logo on the box). Probably due to certain constraints, the beam saber is not included in this kit, but the beam saber from the old SD BB Senshi #203 Wing Gundam 0 Custom may be compatible (both kits share the same beam saber design when compared from their respective MG kits).
PRELIMINARY REVIEW
Box art
Front:
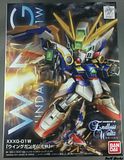
The SD’s box art is very much the same as with the MG #143 (re-release version of the MG #69 together with two additional parts and different markings/decals): the mech on its firing pose with a darken sky and some ruins with the mech’s Bird Mode on the background. Same with the MG, the mech’s name and model number are written on the background with large white/blue lettering on the left side, the series’ trademark near the upper right corner, and the Endless Waltz and Bandai logos on the lower right corner.
North/South side:


Like the MG, the north/south side of the box also features a simplified version of the box art, but with the Bird Mode on the foreground on the north side and the MS mode on the south. The BB Soldiers # is displayed at the top left corner of the side.
West side:

This side only features the kit’s straight-built, unpainted version (much like those new MGs and HGs) and the so-called SD BB-original. The kit’s material and recycling info as well as its barcode are also located here.
East side:

This side features the different accessories and gimmicks of the kit, including its Bird Mode. The mech’s full-size version is shown on the lower left corner.
Box open:

Kit contents:

Runners:
A1:
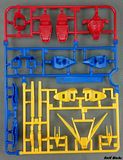
A2:
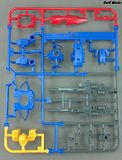
B1:

B2:
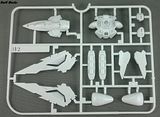
SV1 (first used in the SD BB#364 GNT-0000 Gundam 00 Qan[T] and in #365 MSN-06S Sinanju):
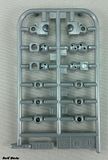
Polycap PC-303:
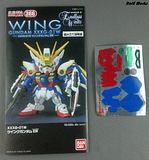
Manual and foil sticker:
Joined runners A1 and A2, and B1 and B2, showing that they were manufactured at the same time then separated to fit in the box:


Separation marks on runner B2, showing that this runner (and runner B1) may be re-released on another kit (possibly an upgraded version of the SD BB#203 GGeneration 0 Wing Gundam Zero Custom; runner B1 only contains the common white parts for the head, arms, legs, and feet):

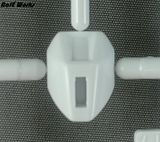
The second type of sprue, so-called “snap-off sprue” since the parts can be literally snapped off without the use of any tools and require lesser trimming. This however results in a greater chance of pitting on the sprue areas and requires putty. This type of sprue was (probably) first introduced in the SD Gundam Mushamaruden kits. Below are samples taken from each runner:




“Speech balloons” on the sticker sheet to point out which sticker represents a certain Katakana character:

Manual:
Front page:

The manual’s front page. Features the completed kit’s front view, with the SD BB #, model number and series logo at the top bar. The Bandai logo is at its usual lower right corner.
MS Design:


Located at the left side of the front page of the (unfolded) manual is the MS Design page(s). Located on these pages are the mech’s design explanation, comparison with the original TV design, and a photo illustrating the mech’s Bird Mode during the events of the first episode of the TV series (specifically the mech’s atmospheric entry). Below these pages are explanations for the Endless Waltz comic and novel.
Gimmick and Action:

This page (located at the leftmost side beyond the front page) illustrates the detail, articulation features, and the transformation of the kit. Also some explanations for certain parts and the stand are included here.
Manual first page:

First page of the black-and-white half of the manual, showing the parts list, caution warnings, and the Japan-exclusive parts order slip.
Parts list:

The kit’s parts list, which includes five parts runners, one new polycap runner, and the sticker sheet. The runners’ general plastic type are also indicated here. Since all parts are used on this kit no parts are indicated as unused.
Spare/Replacement parts order slip:
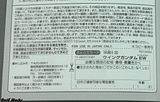
The order slip for securing spare/replacement parts directly from Bandai. As usual this service is only available for Japan-based customers only. At the lower left side of the order slip are the postal code, address, contact number, and office hours of (the assumed) Bandai’s Hobby Department.
Building tutorial:

The manual included a building tutorial, which is very beneficial for children and for first-time model kit builders. This tutorial goes step-by-step from locating an indicated part from the manual to the runner to how the indicated part be removed from the runner itself.
Building instructions last page:

Like the new 1:144 HG kits (and newer SD kits), this kit also has the last of its building instructions on the “colored side” of the manual. Located directly to the right of the front page of the unfolded manual, this page includes the transformation of the weapons to form the so-called “SD original” gimmick, as well as the completed kit’s review (as opposed on the front page’s front view) and the weapons, and some info on the MG Gundam-W EW series (with the completed kit and box art of this kit’s MG counterpart). Below this page is the color guide for the kit.
Color guide:

The kit’s color guide. Since this kit is typically targeted for kids and beginners/amateur modelers, the color guide uses GSI Creos’ Gundam Markers for painting the kit. For those who want to really paint the kit, they may use the equivalent, word-for-word Gundam Color line or the neutral version of the kit’s colors.
MAIN REVIEW:
Note: Foil stickers are applied to this kit as directed by the manual. Any large seam lines present on the kit are the result of trimming the underlying male pegs for disassembly preparation, unless stated otherwise.
Body parts:
Head:
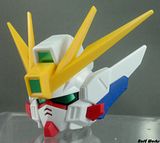
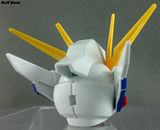
The head section of the kit. Typically of all SD kits, the head is usually the largest part of the body, and this kit is of no exception. The head is constructed using front and rear halves, with a diagonal seam line running at the upper sides of the head. The larger ear fins are all made in white plastic, so the blue portions must be painted. The minor red ear fins though are integrated to the large inner part which also houses the eyes and the chin. Behind the ear fins and the v-fin are gaps that must be filled with putty. The gap behind the head though must not be filled since it is used for the transformation process.
One very interesting to note of is the “internal detail” of the head. Unlike all previously-released SD kits, this kit includes some internal detail on the head, particularly on the red part. This detail consists of panel lines and some etched details on the front and side, as well as the two forehead cameras. Also, since the “nose vents” are now holes (and not just panel lines), the red part underneath also gives off some color detail.


The internal red part in front and left side views.

A “pit hole” resulting from the type of sprue used. These “pit holes” are relatively common to this kit.
Body:


Like the head section, the body/chest also features front-and-rear half construction (their seam line at the sides can be made as a natural panel line though), but this time a yellow part is now the “internal” part. This yellow part contains the search eye and the (supposed) machine cannons, and also the one that houses the ball socket shoulder polycaps. A red part now forms the lower chest section of the kit. A double-ball polycap connects the head and the collar section of the chest, and a ball-and-hinge polycap connects the body to the waist section. The bulge on the sides of the yellow part is due to make some space for the shoulder socket polycaps and thus a sticker covers this part (for now).
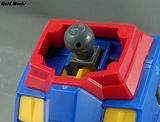
The body-to-waist polycap connected underneath the chest.
Arms:

The arms, divided into three sections: the shoulder armor, the entire arm, and the hand. The shoulder armors are a multi-color work of art: there are no parts on this section that compose of halves, therefore no seam lines are present. The other two sections are the same. Unlike the previous SD 00 kits, the elbows can be moved (much probably due to the arms that must be straight when transformed, compared to the bent ones on the aforementioned kits), therefore increasing its poseable range. The upper and lower arms are connected by a hinge polycap, which can be separated when both upper and lower sections are disassembled. The upper arm part requires putty, since it is hollow at the back. The hand ball joint is connected plastic-to-plastic to the lower arm, therefore ensures a tight connection. On the other hand though, the upper arm is connected to the shoulder armor via a ball polycap, and for some reason the whole arm and hand unit will fall off when the arms are posed extensively. The shoulder armors are connected to the chest via a ball-and-socket polycap joint, with the socket as the polycap. In contrast to the shoulder-to-arm joint, the chest-to-shoulder joint is very tight, and any attempt to dislodge the shoulder’s plastic ball joint from the socket polycap will result to dislodging the polycap itself (but with the shoulder still attached). The arm claw features two holes, wherein the lower one can be filled with putty but the upper one must be left intact: this is where the E-Pac canister bundles are connected to the arm.
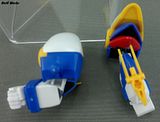


The articulation ranges for the arms and the shoulder armor.

(Outer) Side view of the whole shoulder/arm unit.
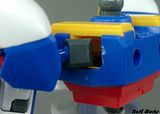
The shoulder-to-chest joint.
Waist:

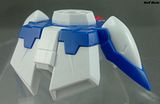
The waist section, which is essentially a combined upper and lower waist units. Like the arms, the whole waist is constructed by just three parts: the main white part, the blue “ring” (when seen at the top), and the tiny red part on the crotch armor. Since this section only consists of three parts, no seam lines are present (and therefore no cementing to be done). The lower part of the rear skirt portion needs to be puttied though since it has a deep hole in it. The waist is connected to the body through the ball socket joint on the center. Since it uses a ball-and-socket joint as its connector, the body can lean front, back, and sideways (after the body is pulled from the waist). When the joint is not in use (particularly when transformed), the upper white portion of the waist is tucked inside the lower red part of the body, giving it stability.
Legs:
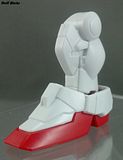


Unlike the arms, the legs feature a left-and-right half construction, with the seam line mostly running at the center of the legs. As with other non-musha SD kits, the ankle armors are fused with the feet, making it as a one whole unit. The legs are connected to the feet by another ball-and-socket joint, with the polycap ball attached to the legs. Thanks to the large cavity at the “ankle portion”, the legs are quite poseable. The legs are connected together in place by a gray pelvic connector (similar to the ones used in 1:144 HG kits; via a yet another (polycap) ball-and-socket joint) and then connected to the underneath of the waist.

Articulation range for the legs.

The “ankle” cavity.

The detail on the sole.
Backpack:
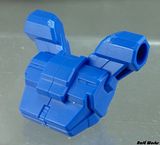

The backpack of the kit, which is only made from two halves. Its seam line runs at the center of this section, only diverting to the side when it passes through a detail spot (in this case, the vents at the bottom). The backpack is connected to the body by two thick pegs, and to the wings via a (plastic-to-plastic) ball-and-socket joint (with the backpack housing the socket joints).
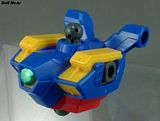

The backpack connected to the back of the body.
Wings:

The wide wings of the kit, which is made out of four parts per wing. The blue angled portion of the wings and all red portions are molded as white, which means those parts have been applied with foil stickers as pictured here, and thus painting is involved on those areas. Certain areas on the wings (particularly on the blue and on the upper yellow part) have raised detail, compared to the etched details on the MG kit. The wings uses a plastic ball joint to connect it to the backpack’s plastic ball socket.

Wings with the backpack connected.


Articulation of the wings while connected to the backpack.
Weapon systems:

The kit includes two weapons, two weapon accessories, and a two-way stand.
Buster Rifle:

The Buster Rifle is constructed by the use of left-and-right halves, with the articulated trigger handle and the blue part as separate pieces. The seam line runs from the center of the barrel to the side of the main body (to avoid the thin raised section and the rifle sensor) then back to the center. Unfortunately the seam line also runs through the center of the middle E-Pac canister. No handle guard is present unlike the original. Two rectangular slots are present near the front end of the main body for the attachment of the wings for the SD Original gimmick. Like the MG kits, the trapezoidal detail below the middle canister serves as one of the two attachment points for the shield (the other being the hole used to attach the arm clip for the shield). When transforming, the blue part is attached to another slot below the middle canister.

The blue cover part when the kit is transformed.
Shield:

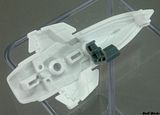
Unlike the previous SD GGeneration kits of both Wing and Wing Zero, the shield is composed of three parts: a red outer part, a larger white part (including the shield’s outer white lining and fin) and a small gray arm latch clip (the other two kits with just only one large red part (plus a yellow part for the Zero) and are either hand-held or attached to the shoulder armor respectively). The attachment position of the shield is the same with the MG kits (the shield is facing to the back) but unlike those kits the shield cannot face sideways. When transformed, the shield is connected to the back of the head using a long tab located at the other end of the shield (instead to the backpack like the two MG and SD kits).
Energy Pac canister bundles:

Like the MG kits, the E-Pac ammo bundles comes as a pair, but they are made out of a single white part each. Behind the bundles are hollow spaces, which can be filled up to a certain extent. The E-Pac and the arm attachment sections needed painting.
Two-way stand:

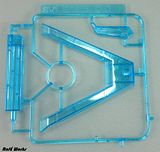
First used in the SD kits of the 00 Qan[T] and Sinanju, this stand is composed of three parts (the base, the stand itself, and the connector) and is made of clear blue (in contrast to the two kits that uses clear green and clear red respectively). The stand connector part is usually attached (to the pelvic joint part) in such a way that the peg points upward, but it can also point forward/horizontally by flipping the connector and reattach it to the stand. Unfortunately since the connector has a 90° corner on one end (opposite to the peg end), the connector cannot swivel for the kit to be posed on an angle. The stand can be also used in other compatible SD and 1:144 kits though.
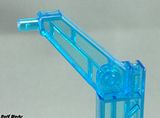
The connector in its horizontal/flight position.
Transformation:
The transformation process is listed as follows:
1. Rotate the arms so that the E-Pac bundles face to the front.
2. Align straight the feet and legs together, then bend the tiptoes downward.
3. Remove the shield’s arm latch clip.
4. Remove the rifle’s blue cover and reattach it to the slot behind the middle E-Pac.
5. Attach the trapezoidal notch on the rifle to the notch tab at the pointed end of the shield.
6. Attach the tab at the other end of the shield to the slot behind the head.
7. Make the stand connector point horizontally.
8. Attach the kit to the stand.
PROFILE PICTURES:
Basic Front view:

Basic Rear view:

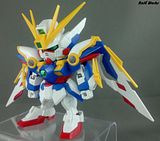
MS Front view:
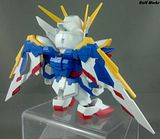
MS Rear view:
Fully-armed Front view:

Fully-armed Rear view:

Various poses:


Bird Mode:


SD BB Original:

Originally introduced in the SD BB kits #236 PA-78 Perfect Gundam (with its “G-Carrier”), #251 FA-78-1 Full-Armor Gundam (with its “G-Base”), and later #273 RX-78NT-1 Gundam NT-1 Alex (with its “Chobham Tank”) and the SD 00 and UC (Unicorn) kits, this kit also has its own “SD BB Original” gimmick in the form of some sort of a sword-fan made from the rifle, shield, and the wings. To assemble this gimmick, the rifle must be attached to the shield using a tab located behind the rifle’s sensor to a rectangular slot in-between two circular slots (doing so also attaches another tab located at the back of the middle E-Pac to a slot in the tab used for connecting the shield to the head). Then the wings are removed from the backpack and are connected to the rifle body’s rectangular slots by the use of small tabs located at the “red” edge portion of the wing, making the wingtips pointing forward (the wing flaps must also pointing up). The rifle’s trigger handle is then turned 90° and then is held like a sword (similar to the 00 Qan[T]’s GN Sword V.
CONCLUSION/RECOMMENDATIONS:
This kit is a good one for beginners, primarily because this kit actually doesn’t require any tools to basically build it, just snap it off from the runners. Not to mention less areas to cement, an included stand, and a color guide based from Gundam Markers. Non-beginners though will have a rather not so smooth sailing on this kit: even snapping them off using modeling side cutters still gives off large pit holes. I suggest using thin photo-etched saws to eliminate (or at least minimize) those holes. Since the arms easily pop off from the shoulder armor, I suggest not using those joints (unless when transforming the kit), only making use of the elbows and the shoulder-to-chest joint. Sealing is only required on the head, backpack, legs, and the rifle. Masking is required on this kit, particularly on the ear fins, machine cannon mounts, search eye, circular detail on the shoulder armors, arm claws, E-Pac ammo bundles, wings, rear skirt, rifle and shield. Since this kit lacks its beam saber, the included one from the old GGeneration-0 Wing Zero Custom may be used, unless if it will be released on the SD Wing Zero EW (if it will ever be released). Pre-paint modifications is needed on this kit, particularly on the head (white face plate must be separated from the front half, not to mention the red ear fins from the whole red internal part). The hands can be filled too with putty, although this is entirely optional since it is hidden away in its MS form, not to mention it may reduce paint chipping on the rifle handle. Since the trigger handle guard is missing, one can scratchbuild it. Also for those who doesn’t want the SD gimmick, they can just saw of the tabs and fill the slots with putty (especially on the rifle).
JUDGING CRITERIA: (Note: applicable criteria involved. 10 highest)
Construction: 4 out of 10 (has rather a good number of parts to be painted, some areas to be puttied, and the pre-paint modifications on the head)
Parts sealing: 1 out of 10 (just the head)
Foil sticker use: 8 out of 10 (aside from the usual eyes and the sensors, although the other parts are generally thin and having them as separate parts will risk breaking the pegs (except the wing flaps and the E-Pac canisters on the rifle and bundle though))
Articulation: 6 out of 10 (more articulated compared to the fixed-elbow SD 00 kits, but the sideways articulation of the arm are hindered because of the large arm claw)
Detail: 8 out of 10 (good detailing, including the soles and especially the internal head part)
Kit modularity: 6 out of 10 (one can make an improved version of sorts by extending some sections, and also one can make an SD Wing 0 EW out of this kit by some kitbashing)
Quality vs. price: 7 out of 10 (simple but impressive kit, plus the $13-$18 price range)
Collectability rating: 7 out of 10 (same as above, and especially to Gundam Wing fans and kit bashers)
Rating formula:
[(Construction – Parts sealing – Foil sticker use + Articulation + Detail + Kit modularity + Quality vs. price)/5 + Collectability rating (extra)]/2
KIT RATING:
5.7 out of 10

Scale: non-scale
Grade: Super Deformed BB Soldiers
SD #: 366
Series: Shin Kidō Senki Gundam Wing: Mugen no Warutsu (New Mobile Report Gundam Wing: Endless Waltz)
Release date: June 9, 2011
Price: ¥840 (inclusive of tax)
Number of Parts:
76 plastic parts
- 64 Polystyrene (PS)
- 12 Polyethylene (PE)
foil stickers
Total Number of Runners: 5 + polycaps
Polycap Number: PC-303
Approximate Plastic Colors: White, Light Blue, Red, Yellow, Gray, Clear Blue
Weapons and Accessories:
Buster rifle x1 (handheld when in use; stored at the shield tip when transformed)
Shield x1 (stored at the back of the head when transformed)
Energy Capacitor storage unit x2 (each with Energy Capacitors x3)
Clear stand base
Kit Gimmicks:
Transformation to “Bird Mode”.
Inclusion of a clear stand base.
Internal head detail.
Original SD feature.
“Snap off” construction (making side cutters optional).
Use of a completely new polycap set which increases the articulation compared to the previous SD 00 kits and making it at par with the older SD SEED kits.
Compatibility with Action Bases 1, 2, and 3, and as well stands from most 1:144 and SD kits.
HISTORY:
The design of this kit (as well as the MG ver. Ka and its EW re-release) is the “improved” (slightly modified) version of Hajime Katoki’s redesign of the XXXG-01W Wing Gundam following with his redesign of the XXXG-00W0 Wing Gundam Zero for the OVA/movie “Gundam Wing Endless Waltz” (and later for the various Endless Waltz spin-offs and continuities). Like the original design for the TV series, this design still employs most of the original’s basic characteristics and weaponry, including the “Bird Mode” transformation. But unlike the original, this redesign also features new characteristics, such as its sleek design, simpler transformation, and the inclusion of two, three-piece E-Pac bundle modules which gives the buster rifle’s severely-limited shots with more ammunition. The only differences between Katoki’s original redesign (later used in the 1:144 and 1:100 resin conversion kits and as a secret unit in the 2nd Super Robot Wars Alpha) and his subsequent redesign are some color scheme variations (E-Pacs, certain portions on the wings and shield), the (originally overlapping) angled section at the rear area of the wing, and the inclusion of a domed section on the rear cover of the rifle and the second E-Pac bundle.
This kit’s release is due to the promotion of the Endless Waltz sequel entitled “Frozen Teardrop” (note the Endless Waltz logo on the box). Probably due to certain constraints, the beam saber is not included in this kit, but the beam saber from the old SD BB Senshi #203 Wing Gundam 0 Custom may be compatible (both kits share the same beam saber design when compared from their respective MG kits).
PRELIMINARY REVIEW
Box art
Front:

The SD’s box art is very much the same as with the MG #143 (re-release version of the MG #69 together with two additional parts and different markings/decals): the mech on its firing pose with a darken sky and some ruins with the mech’s Bird Mode on the background. Same with the MG, the mech’s name and model number are written on the background with large white/blue lettering on the left side, the series’ trademark near the upper right corner, and the Endless Waltz and Bandai logos on the lower right corner.
North/South side:


Like the MG, the north/south side of the box also features a simplified version of the box art, but with the Bird Mode on the foreground on the north side and the MS mode on the south. The BB Soldiers # is displayed at the top left corner of the side.
West side:

This side only features the kit’s straight-built, unpainted version (much like those new MGs and HGs) and the so-called SD BB-original. The kit’s material and recycling info as well as its barcode are also located here.
East side:

This side features the different accessories and gimmicks of the kit, including its Bird Mode. The mech’s full-size version is shown on the lower left corner.
Box open:

Kit contents:

Runners:
A1:

A2:

B1:

B2:

SV1 (first used in the SD BB#364 GNT-0000 Gundam 00 Qan[T] and in #365 MSN-06S Sinanju):

Polycap PC-303:

Manual and foil sticker:

Joined runners A1 and A2, and B1 and B2, showing that they were manufactured at the same time then separated to fit in the box:


Separation marks on runner B2, showing that this runner (and runner B1) may be re-released on another kit (possibly an upgraded version of the SD BB#203 GGeneration 0 Wing Gundam Zero Custom; runner B1 only contains the common white parts for the head, arms, legs, and feet):

The second type of sprue, so-called “snap-off sprue” since the parts can be literally snapped off without the use of any tools and require lesser trimming. This however results in a greater chance of pitting on the sprue areas and requires putty. This type of sprue was (probably) first introduced in the SD Gundam Mushamaruden kits. Below are samples taken from each runner:


“Speech balloons” on the sticker sheet to point out which sticker represents a certain Katakana character:

Manual:
Front page:

The manual’s front page. Features the completed kit’s front view, with the SD BB #, model number and series logo at the top bar. The Bandai logo is at its usual lower right corner.
MS Design:


Located at the left side of the front page of the (unfolded) manual is the MS Design page(s). Located on these pages are the mech’s design explanation, comparison with the original TV design, and a photo illustrating the mech’s Bird Mode during the events of the first episode of the TV series (specifically the mech’s atmospheric entry). Below these pages are explanations for the Endless Waltz comic and novel.
Gimmick and Action:

This page (located at the leftmost side beyond the front page) illustrates the detail, articulation features, and the transformation of the kit. Also some explanations for certain parts and the stand are included here.
Manual first page:

First page of the black-and-white half of the manual, showing the parts list, caution warnings, and the Japan-exclusive parts order slip.
Parts list:

The kit’s parts list, which includes five parts runners, one new polycap runner, and the sticker sheet. The runners’ general plastic type are also indicated here. Since all parts are used on this kit no parts are indicated as unused.
Spare/Replacement parts order slip:

The order slip for securing spare/replacement parts directly from Bandai. As usual this service is only available for Japan-based customers only. At the lower left side of the order slip are the postal code, address, contact number, and office hours of (the assumed) Bandai’s Hobby Department.
Building tutorial:

The manual included a building tutorial, which is very beneficial for children and for first-time model kit builders. This tutorial goes step-by-step from locating an indicated part from the manual to the runner to how the indicated part be removed from the runner itself.
Building instructions last page:

Like the new 1:144 HG kits (and newer SD kits), this kit also has the last of its building instructions on the “colored side” of the manual. Located directly to the right of the front page of the unfolded manual, this page includes the transformation of the weapons to form the so-called “SD original” gimmick, as well as the completed kit’s review (as opposed on the front page’s front view) and the weapons, and some info on the MG Gundam-W EW series (with the completed kit and box art of this kit’s MG counterpart). Below this page is the color guide for the kit.
Color guide:

The kit’s color guide. Since this kit is typically targeted for kids and beginners/amateur modelers, the color guide uses GSI Creos’ Gundam Markers for painting the kit. For those who want to really paint the kit, they may use the equivalent, word-for-word Gundam Color line or the neutral version of the kit’s colors.
MAIN REVIEW:
Note: Foil stickers are applied to this kit as directed by the manual. Any large seam lines present on the kit are the result of trimming the underlying male pegs for disassembly preparation, unless stated otherwise.
Body parts:
Head:


The head section of the kit. Typically of all SD kits, the head is usually the largest part of the body, and this kit is of no exception. The head is constructed using front and rear halves, with a diagonal seam line running at the upper sides of the head. The larger ear fins are all made in white plastic, so the blue portions must be painted. The minor red ear fins though are integrated to the large inner part which also houses the eyes and the chin. Behind the ear fins and the v-fin are gaps that must be filled with putty. The gap behind the head though must not be filled since it is used for the transformation process.
One very interesting to note of is the “internal detail” of the head. Unlike all previously-released SD kits, this kit includes some internal detail on the head, particularly on the red part. This detail consists of panel lines and some etched details on the front and side, as well as the two forehead cameras. Also, since the “nose vents” are now holes (and not just panel lines), the red part underneath also gives off some color detail.


The internal red part in front and left side views.

A “pit hole” resulting from the type of sprue used. These “pit holes” are relatively common to this kit.
Body:


Like the head section, the body/chest also features front-and-rear half construction (their seam line at the sides can be made as a natural panel line though), but this time a yellow part is now the “internal” part. This yellow part contains the search eye and the (supposed) machine cannons, and also the one that houses the ball socket shoulder polycaps. A red part now forms the lower chest section of the kit. A double-ball polycap connects the head and the collar section of the chest, and a ball-and-hinge polycap connects the body to the waist section. The bulge on the sides of the yellow part is due to make some space for the shoulder socket polycaps and thus a sticker covers this part (for now).

The body-to-waist polycap connected underneath the chest.
Arms:

The arms, divided into three sections: the shoulder armor, the entire arm, and the hand. The shoulder armors are a multi-color work of art: there are no parts on this section that compose of halves, therefore no seam lines are present. The other two sections are the same. Unlike the previous SD 00 kits, the elbows can be moved (much probably due to the arms that must be straight when transformed, compared to the bent ones on the aforementioned kits), therefore increasing its poseable range. The upper and lower arms are connected by a hinge polycap, which can be separated when both upper and lower sections are disassembled. The upper arm part requires putty, since it is hollow at the back. The hand ball joint is connected plastic-to-plastic to the lower arm, therefore ensures a tight connection. On the other hand though, the upper arm is connected to the shoulder armor via a ball polycap, and for some reason the whole arm and hand unit will fall off when the arms are posed extensively. The shoulder armors are connected to the chest via a ball-and-socket polycap joint, with the socket as the polycap. In contrast to the shoulder-to-arm joint, the chest-to-shoulder joint is very tight, and any attempt to dislodge the shoulder’s plastic ball joint from the socket polycap will result to dislodging the polycap itself (but with the shoulder still attached). The arm claw features two holes, wherein the lower one can be filled with putty but the upper one must be left intact: this is where the E-Pac canister bundles are connected to the arm.


The articulation ranges for the arms and the shoulder armor.

(Outer) Side view of the whole shoulder/arm unit.

The shoulder-to-chest joint.
Waist:


The waist section, which is essentially a combined upper and lower waist units. Like the arms, the whole waist is constructed by just three parts: the main white part, the blue “ring” (when seen at the top), and the tiny red part on the crotch armor. Since this section only consists of three parts, no seam lines are present (and therefore no cementing to be done). The lower part of the rear skirt portion needs to be puttied though since it has a deep hole in it. The waist is connected to the body through the ball socket joint on the center. Since it uses a ball-and-socket joint as its connector, the body can lean front, back, and sideways (after the body is pulled from the waist). When the joint is not in use (particularly when transformed), the upper white portion of the waist is tucked inside the lower red part of the body, giving it stability.
Legs:


Unlike the arms, the legs feature a left-and-right half construction, with the seam line mostly running at the center of the legs. As with other non-musha SD kits, the ankle armors are fused with the feet, making it as a one whole unit. The legs are connected to the feet by another ball-and-socket joint, with the polycap ball attached to the legs. Thanks to the large cavity at the “ankle portion”, the legs are quite poseable. The legs are connected together in place by a gray pelvic connector (similar to the ones used in 1:144 HG kits; via a yet another (polycap) ball-and-socket joint) and then connected to the underneath of the waist.

Articulation range for the legs.

The “ankle” cavity.

The detail on the sole.
Backpack:


The backpack of the kit, which is only made from two halves. Its seam line runs at the center of this section, only diverting to the side when it passes through a detail spot (in this case, the vents at the bottom). The backpack is connected to the body by two thick pegs, and to the wings via a (plastic-to-plastic) ball-and-socket joint (with the backpack housing the socket joints).


The backpack connected to the back of the body.
Wings:

The wide wings of the kit, which is made out of four parts per wing. The blue angled portion of the wings and all red portions are molded as white, which means those parts have been applied with foil stickers as pictured here, and thus painting is involved on those areas. Certain areas on the wings (particularly on the blue and on the upper yellow part) have raised detail, compared to the etched details on the MG kit. The wings uses a plastic ball joint to connect it to the backpack’s plastic ball socket.

Wings with the backpack connected.


Articulation of the wings while connected to the backpack.
Weapon systems:

The kit includes two weapons, two weapon accessories, and a two-way stand.
Buster Rifle:

The Buster Rifle is constructed by the use of left-and-right halves, with the articulated trigger handle and the blue part as separate pieces. The seam line runs from the center of the barrel to the side of the main body (to avoid the thin raised section and the rifle sensor) then back to the center. Unfortunately the seam line also runs through the center of the middle E-Pac canister. No handle guard is present unlike the original. Two rectangular slots are present near the front end of the main body for the attachment of the wings for the SD Original gimmick. Like the MG kits, the trapezoidal detail below the middle canister serves as one of the two attachment points for the shield (the other being the hole used to attach the arm clip for the shield). When transforming, the blue part is attached to another slot below the middle canister.

The blue cover part when the kit is transformed.
Shield:


Unlike the previous SD GGeneration kits of both Wing and Wing Zero, the shield is composed of three parts: a red outer part, a larger white part (including the shield’s outer white lining and fin) and a small gray arm latch clip (the other two kits with just only one large red part (plus a yellow part for the Zero) and are either hand-held or attached to the shoulder armor respectively). The attachment position of the shield is the same with the MG kits (the shield is facing to the back) but unlike those kits the shield cannot face sideways. When transformed, the shield is connected to the back of the head using a long tab located at the other end of the shield (instead to the backpack like the two MG and SD kits).
Energy Pac canister bundles:

Like the MG kits, the E-Pac ammo bundles comes as a pair, but they are made out of a single white part each. Behind the bundles are hollow spaces, which can be filled up to a certain extent. The E-Pac and the arm attachment sections needed painting.
Two-way stand:

First used in the SD kits of the 00 Qan[T] and Sinanju, this stand is composed of three parts (the base, the stand itself, and the connector) and is made of clear blue (in contrast to the two kits that uses clear green and clear red respectively). The stand connector part is usually attached (to the pelvic joint part) in such a way that the peg points upward, but it can also point forward/horizontally by flipping the connector and reattach it to the stand. Unfortunately since the connector has a 90° corner on one end (opposite to the peg end), the connector cannot swivel for the kit to be posed on an angle. The stand can be also used in other compatible SD and 1:144 kits though.

The connector in its horizontal/flight position.
Transformation:
The transformation process is listed as follows:
1. Rotate the arms so that the E-Pac bundles face to the front.
2. Align straight the feet and legs together, then bend the tiptoes downward.
3. Remove the shield’s arm latch clip.
4. Remove the rifle’s blue cover and reattach it to the slot behind the middle E-Pac.
5. Attach the trapezoidal notch on the rifle to the notch tab at the pointed end of the shield.
6. Attach the tab at the other end of the shield to the slot behind the head.
7. Make the stand connector point horizontally.
8. Attach the kit to the stand.
PROFILE PICTURES:
Basic Front view:

Basic Rear view:

MS Front view:

MS Rear view:

Fully-armed Front view:

Fully-armed Rear view:

Various poses:


Bird Mode:


SD BB Original:

Originally introduced in the SD BB kits #236 PA-78 Perfect Gundam (with its “G-Carrier”), #251 FA-78-1 Full-Armor Gundam (with its “G-Base”), and later #273 RX-78NT-1 Gundam NT-1 Alex (with its “Chobham Tank”) and the SD 00 and UC (Unicorn) kits, this kit also has its own “SD BB Original” gimmick in the form of some sort of a sword-fan made from the rifle, shield, and the wings. To assemble this gimmick, the rifle must be attached to the shield using a tab located behind the rifle’s sensor to a rectangular slot in-between two circular slots (doing so also attaches another tab located at the back of the middle E-Pac to a slot in the tab used for connecting the shield to the head). Then the wings are removed from the backpack and are connected to the rifle body’s rectangular slots by the use of small tabs located at the “red” edge portion of the wing, making the wingtips pointing forward (the wing flaps must also pointing up). The rifle’s trigger handle is then turned 90° and then is held like a sword (similar to the 00 Qan[T]’s GN Sword V.
CONCLUSION/RECOMMENDATIONS:
This kit is a good one for beginners, primarily because this kit actually doesn’t require any tools to basically build it, just snap it off from the runners. Not to mention less areas to cement, an included stand, and a color guide based from Gundam Markers. Non-beginners though will have a rather not so smooth sailing on this kit: even snapping them off using modeling side cutters still gives off large pit holes. I suggest using thin photo-etched saws to eliminate (or at least minimize) those holes. Since the arms easily pop off from the shoulder armor, I suggest not using those joints (unless when transforming the kit), only making use of the elbows and the shoulder-to-chest joint. Sealing is only required on the head, backpack, legs, and the rifle. Masking is required on this kit, particularly on the ear fins, machine cannon mounts, search eye, circular detail on the shoulder armors, arm claws, E-Pac ammo bundles, wings, rear skirt, rifle and shield. Since this kit lacks its beam saber, the included one from the old GGeneration-0 Wing Zero Custom may be used, unless if it will be released on the SD Wing Zero EW (if it will ever be released). Pre-paint modifications is needed on this kit, particularly on the head (white face plate must be separated from the front half, not to mention the red ear fins from the whole red internal part). The hands can be filled too with putty, although this is entirely optional since it is hidden away in its MS form, not to mention it may reduce paint chipping on the rifle handle. Since the trigger handle guard is missing, one can scratchbuild it. Also for those who doesn’t want the SD gimmick, they can just saw of the tabs and fill the slots with putty (especially on the rifle).
JUDGING CRITERIA: (Note: applicable criteria involved. 10 highest)
Construction: 4 out of 10 (has rather a good number of parts to be painted, some areas to be puttied, and the pre-paint modifications on the head)
Parts sealing: 1 out of 10 (just the head)
Foil sticker use: 8 out of 10 (aside from the usual eyes and the sensors, although the other parts are generally thin and having them as separate parts will risk breaking the pegs (except the wing flaps and the E-Pac canisters on the rifle and bundle though))
Articulation: 6 out of 10 (more articulated compared to the fixed-elbow SD 00 kits, but the sideways articulation of the arm are hindered because of the large arm claw)
Detail: 8 out of 10 (good detailing, including the soles and especially the internal head part)
Kit modularity: 6 out of 10 (one can make an improved version of sorts by extending some sections, and also one can make an SD Wing 0 EW out of this kit by some kitbashing)
Quality vs. price: 7 out of 10 (simple but impressive kit, plus the $13-$18 price range)
Collectability rating: 7 out of 10 (same as above, and especially to Gundam Wing fans and kit bashers)
Rating formula:
[(Construction – Parts sealing – Foil sticker use + Articulation + Detail + Kit modularity + Quality vs. price)/5 + Collectability rating (extra)]/2
KIT RATING:
5.7 out of 10




 keeping the site active as a place to dump info for easier backtracking.