Post by E_Wing on Jul 26, 2011 23:59:33 GMT 8
Kit: OZ-13MS Gundam Epyon (Endless Waltz version)
Scale: 1:100
Grade: Master Grade
MG #: 145
Series: Shin Kidō Senki Gundam Wing: Mugen no Warutsu (New Mobile Report Gundam Wing: Endless Waltz)
Release date: June 23, 2011
Price: ¥4,800 (inclusive of tax)
Number of Parts:
324 plastic parts
- 320 actual parts
- 175 Polystyrene (PS)
- 126 Acrylonitrile butadiene styrene (ABS)
- 19 Polyethylene (PE)
- 4 unneeded polycaps
foil stickers
marking seals
dry-transfer decals
PVC-coated, single-strand copper wire (of unknown gauge)
Total Number of Runners: 14 + polycaps
Polycap Number: PC-205BC
Approximate Plastic Colors:
Maroon Red, Very Dark Blue, Gray, Cool Gray, Yellow, White, Clear, Clear Green
Weapons and Accessories:
Beam sword x1 (hand-held with “retractable” feature; stored on holding rack on the side skirt armor when not in use)
Heat rod x1 (shield with integrated heat whip; mounted on the arm)
Hand manipulator set
1:100 scale pilot figure (sitting and standing)
Action Base 1 adapter
Gundam Wing Endless Waltz / Frozen Teardrop tankōbon (limited production for the kit’s initial production batch)
Kit Gimmicks:
Transformation to twin-headed dragon-type Mobile Armor mode
“Retractable” feature on the beam sword
Independent articulation for each whip and leg/dragon neck segments
Full-body internal frame
Pilot figure
“Pull to expand” feature of the wing
Swappable manipulator set
Ver. Ka-style markings
Compatibility with all variants of Bandai's Action Base 1 using the included adapters
HISTORY:
Based from the data of the OZ-00MS Tallgeese and the five “Operation Meteor” Gundams, Trieze Khushrenada created the transformable mobile suit OZ-13MS Gundam Epyon while under house-arrest by the Romefeller Foundation. Like its brother unit (and little known) OZ-14MS Gundam Aquarius, the Epyon was designed by Treize to realize his ideal of a “gentleman soldier”, but unlike the Aquarius (which was designed for his hatred of the mobile doll system) the Epyon was considered as the embodiment of Treize’s love for honorable duels. As such, the Epyon was outfitted with only close combat weapons: a reactor-fed, high-output beam sword, and a 10-segment heat whip integrated on its shield (collectively known as the “heat rod”). Aside from these two weapons, he also outfitted the mech with a so-called “Epyon System”: a modified Zero System which retains the same capabilities (including its hallucination-inducing effects) but requires a special helmet to be worn on the pilot’s head, a chest-mounted search eye which was the same type as the one used in the XXXG-01W Wing Gundam, and the ability to transform into a mobile armor mode which resembles a two-headed dragon.
After the Epyon was built, Treize hope that a capable pilot (specifically a Gundam pilot) would come forth and pilot the suit, until Wing Gundam’s pilot Heero Yuy came with the intention to assassinate Treize. Instead of assassinating Trieze, Heero accepted Treize’s offer to pilot the Epyon. After Heero boarded the mech, Treize warned him not to be a “winner” when piloting it, meaning that achieving victory must not on his mind, but only the fighting itself (probably a forewarning to the effects of the Zero/Epyon System). After hearing that Romefeller launched an invasion to the pacifist Sanc Kingdom ruled by Relena Peacecraft, Heero piloted the Epyon into battle but since he haven’t mastered the Zero System (this is the second time he piloted a mobile suit with the system), he suffered a near-nervous breakdown and fled the battle. After Relena’s brother Milliardo Peacecraft (formerly known as Zechs Merquise) arrived too late with his newly-acquired XXXG-00W0 Wing Gundam Zero to defend the kingdom, Heero (thru the Epyon System) mistook the Wing Zero as an enemy and fought themselves to a stalemate and ceased. After the battle the two exchanged their mechs with each other (for some unknown reason).
Sometime after Milliardo took and began piloting the Epyon, the Organization of Zodiac (OZ) splinter group called the “Treize Faction” was reformed as the “White Fang” (after their Luxembourg headquarters (and Treize’s residence) was destroyed by Romefeller) and claimed responsibility with defending the space colonies, their chief (and founder) Quinze (who actually took this as a golden opportunity to exact revenge on Earth for killing the late politician (and the original) Heero Yuy (Quinze was one of his foremost followers)) offered Milliardo the leadership of the group, noting that the White Fang needs a charismatic leader just like Treize before his was relieved as an OZ commander. Milliardo accepted the offer and continued to pilot the Epyon against the newly-established Earth Sphere Unified Nation (ESUN). During this time, the White Fang considers the five Gundams to be working under Romefeller/ESUN and therefore considers them to be an enemy.
At the final battle during the Christmas Eve War of A.C. 195, Milliardo flew the Epyon against the Gundam pilots, and later challenged Heero again for a re-match inside and around the captured Romefeller space battleship Libra. During this battle they reached another stalemate, until they reached one of Libra’s sections which was in the process of atmospheric entry. During their fight inside that section, Heero/Wing Zero manages to severe Epyon’s left arm, giving Heero a decisive win. As Heero prepared the Wing Zero to self-destruct to destroy the free-falling section, Milliardo convinced Heero to leave and he used the Epyon to destroy the section’s main reactor. Both Milliardo and the Epyon are presumed to be lost and missing/killed in action after the resulting explosion until Milliardo (as Codename “Wind”) resurfaces about a year later and the repaired Epyon during M.C. (Mars Century) 0022 – Next Winter (one Martian year = 1.8808 Julian/Earth years or approximately two years. The “Next Winter” indicates that it is winter on Earth during the second half of the Martian year.).
It is noted that the repaired Epyon during the events of Gundam Wing: Frozen Teardrop was piloted by a certain Major General Zechs Merquise (a nanobot replica of the original Zechs, complete with his memories), which is the leader of Mars’ Lanigreen Republic in a revolt against (the newly-reawakened) Relena’s Mars Federation. Also there is a second unit piloted by Chang Wufei (now known as the Preventer’s Master Chang) called the “Gundam Epyon White” (probable model number OZ-13MS/W) which sports a white and blue color scheme, is equipped with a dragon fang (which has a resemblance to the leg) and a beam trident (instead of its original weapons), and transforms into a three-headed dragon mobile armor (with the dragon fang as its center head and the beam trident as its tail).
PRELIMINARY REVIEW
Box art
Front:

The main box art is designed the usual way as with most other MG’s: the mech’s name and model number in a white-outline lettering on the leftmost edge, MG logo at the top right corner, the series’ trademark logo below the MG logo, and the Bandai logo at the bottom right corner. Below the series’ trademark logo is a note that a Frozen Teardrop tankōbon is included in the kit (for its initial production batch only) and the series’ main logo. The box CG art itself is done by Eto Koji (which depicts the mech and its MA form in the foreground, and the Wing Zero, Libra, and the Earth at the background) with the finishing touches done by Artpresto and Yam2.

The tankōbon mark and the Endless Waltz logo.
North side:


The north side of the box features the Endless Waltz MS design explanation, and the synopsis for both Endless Waltz and Frozen Teardrop. An image pose of the completed kit is present on the left side and the kit’s material and recycling, and illustration info’s as well as the kit’s barcode are present on the right.
South side:


The south portion of the box contains the front, rear, and MA view of the completed kit, as well as information on the different features of the kit.
West/East side:

This side is a simplified/compacted form of the box front, including a cropped version of the box art.
Box open:

Kit contents:

Runner A (PS):

Runner B (x2; PS):

Runner C1 (PS):

Runner C2 (a trimmed-down version of the C1; PS):
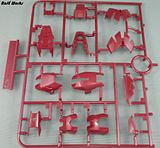
*Runner C2 on top of C1 showing the repeated parts:

Runner D (x2; PS):

Runner E (PS):
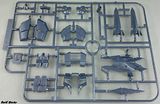
Runner F (PS):

Runner G (x2; ABS):

Runner H (ABS):

Runner I (x2; ABS):
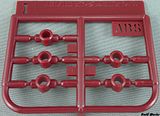
*Indication arrows present on all ABS runners showing where to cut each part:
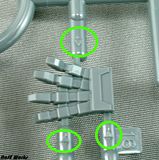
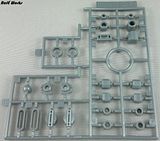
Polycap PC-205BC (PE):
Instruction manual and tankōbon:

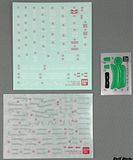
Foil sticker, marking seals, and dry-transfer decal sheets:
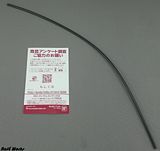
PVC-coated copper wire and promo slip:
Manual:
Front page:
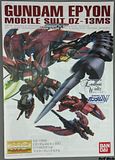
First used in the MG #137 XXXG-01D Gundam Deathscythe EW ver., the design for the front page of the manual uses a plain white image with the CG art of the mech on the box art as background, and the mech’s name and model number, and the series’, MG, and Bandai logos on the foreground.
MS Design page:
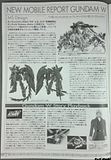
This page covers the information about the retconned mech designs used for the Glory of the Defeated manga (which was actually first used in the featured flashbacks in the Endless Waltz OVA/movie). Below this page is a story recap of the Epyon in the TV series.
Tutorials page:
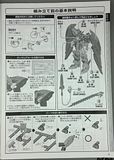
This page covers the cutting, assembly, and the dry-transfer marking placement tutorials as well as the assembly order of the kit.

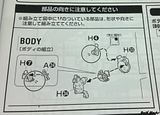
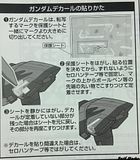
The cutting, assembly, and the dry-transfer placement tutorials.

The assembly order of the kit.
Assembly Index:


The assembly index of the kit, first located at the side of the tutorials page. Most regular MG kits has this index.
Parts List:
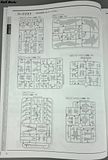
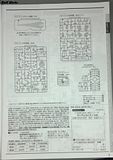
The parts list for the kit. This kit contains 15 runners all-in-all, plus the three detailing sheets and the PVC-coated wire. The tankōbon and the manual itself are not listed here. Below the second page is the parts order slip.
Spare Parts Order Slip:

The spare parts order slip, which is always located underneath the parts list page. This is a Japan-only service though.
Instruction manual first page:
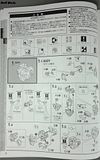
The first page of the instruction manual. At the top of the page are assembly warnings and the assembly notifications required on this kit.
Assembly Notifications:

The assembly notifications of the kit, which must be followed while building the kit to ensure proper assembly. The grayed-out ones are not to be used.
Assembled section 3D view:
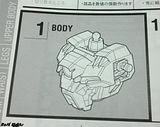
Located just before assembling a section, a 3D view of that section is displayed to show the builder what part is to be assembled.
Documentary Photographs:
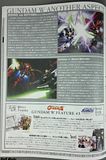
This page contains the documentary photographs as described in the Glory of the Defeated manga, or basically the scenes from the TV series’ last episodes using the Endless Waltz mech designs.
Manga/Novel Synopsis:

Found below the documentary photographs page, this portion contains the synopsis for the Glory of the Defeated manga and the Frozen Teardrop novel. Pictured here are the front covers for the manga and the initial two tankōbons for the novel.
Model Data page:
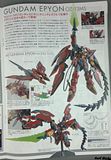
This page covers the model data for the kit, including this kit’s history and as well as some features of the kit. Also pictured here are a CAD photo and a preliminary sketch during the kit’s design stage.
Transformation page:
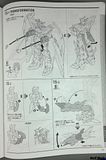
This page illustrates the transformation process required for the kit to transform into its unique MA form.
Marking placement page:
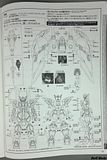
This page shows the positioning of the different, Katoki-styled marking seals and dry-transfer decals to the kit. This page is also required when placing the optional water-slide decals when it becomes available.
Rear cover:
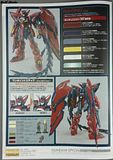
The rear page of the manual. Starting with the Deathscythe EW kit (and exclusive to all EW kits after it), the rear cover contains the front and rear views of the completed kit, as well as the color guide for the mech and pilot figure, and the panel-lining/detailing guide.
Color guide:
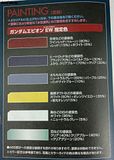

The color guide for the mech and the pilot figure. Uses the GSI Creos’ Mr. Color line. Underneath the mech’s color guide is a note for painting the ABS parts.
Detailing guide:
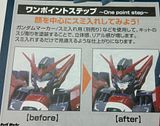
This page contains the information regarding how to detail the kit using Gundam Markers GM01-03.
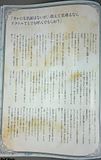
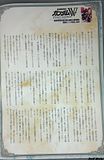
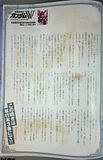
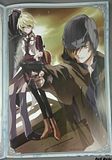
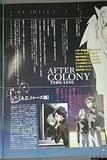
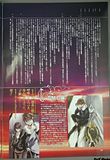
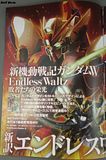
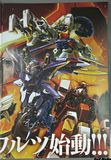
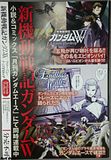
Tankōbon:
Note: The tankōbon (according from Wikipedia) is “the Japanese term for a book that is complete in itself and is not part of a series (similar to a monograph), though the manga industry uses it for volumes which may be in a series”. Since this is a Japanese book itself, it is read from right to left. Also note that these photographs are used for this documentation only since this is a limited accessory.






MAIN REVIEW:
Note: Foil stickers are applied to this kit as directed by the manual. Any large seam lines present on the kit are the result of trimming the underlying male pegs for disassembly preparation, unless stated otherwise.
Body parts:
Head:
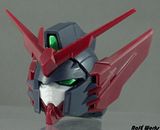
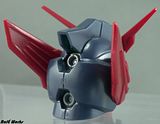
Like the MG #131 XXXG-01W Wing Gundam TV ver., the head contains an internal part, surrounded by the three-piece face and sensor plate, followed by a sideways half-and-half head armor construction, a separate forehead part, the head crest, and the v-fin. The ear fins are also separate parts. Two sensor-like circular detail are molded on the internal part and can be seen from the back. The head is connected to the body by a ball-and-socket joint (with the head containing the socket polycap).
Body:
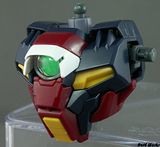
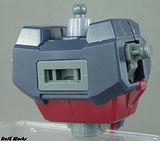
The body section of the kit. This section contains the cockpit core, backpack attachment, the (now-standard) swiveling shoulder joints, and the search eye. The cockpit core is exactly the same as the Wing’s except for the latter’s main hatch attachment. The cockpit core is surrounded by more internal parts then by the armor parts. The armor parts consists of front and back armor pieces, as well as the cockpit hatch, collar, and a large piece below those armors. The backpack is connected to the body by a square polycap at the back.
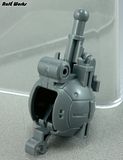
The cockpit core of the kit.
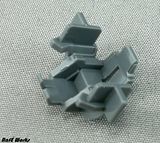
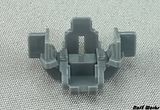
The cockpit seat and module inside the core.
The opened cockpit hatch.
Arms:
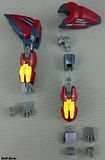
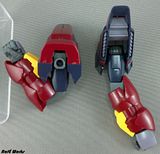
The arm section of the kit and its assembly. This section consists of the shoulder armors, upper arm joint, upper arm, lower arm with the integrated arm claw and the elbow joint, and the swappable manipulator set. The shoulder armors itself consists of two internal parts, followed by four half-and-half armor covers and are bound together by three parts. The upper arm joint is quite similar with the Wing’s except for the latter’s “slide rail”. The upper arm is just a hollow part with an another small part attached to it. The internal part for the lower arm (and therefore the elbow joint) can be removed from the lower arm armor by removing the armor’s bottom part followed by the wrist cover and then the main armor. For some reason the wrist joint is not directly connected to the internal arm frame. The claw can be deployed by pulling the entire claw out from the arm. The arms do not use any polycaps except for the wrist joint.

The elbow’s articulation range.


The chest-to-shoulder joint’s articulation range.
Waist:
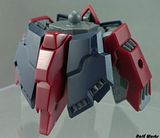
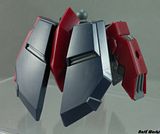
The waist section of the kit. The waist section is basically just a block of internal frame then covered by the crotch and the center rear skirt armors, followed by the articulated skirt armors. All six articulated skirt armors consists of an internal plating and covered by their respective armor parts, and are joined to the waist by their respective ball sockets. Due to the mech’s unique transformation mode, the frame block is articulated (and can be dislodged) for the legs to change position for transformation (held by two different clips when in MS mode). The waist is joined directly to the body by the use of a ball-and-socket joint (the waist has the ball portion) and to the legs by pivot joints (with a separate part containing the joint itself). For some reason this kit doesn’t have an upper waist portion, probably due to stability issues when transformed (although a separate, independent part acts as a cover for the body-waist joint).
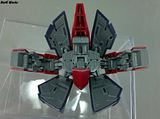
The lower waist as viewed from underneath.
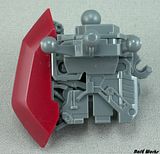

The waist’s internal frame block, when in the MS form and when fully extended.

The legs’ pivot joint.
Legs:


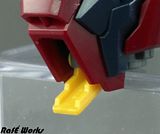
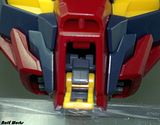
The leg section of the kit. Due to its role as a dragon’s “head” and “neck”, the legs itself is composed of two segment held together by a sliding joint, and the feet includes a dragon’s “mouth” for additional detail. Unlike the previous MG EW releases, this kit doesn’t have an independently-moving knee guard but its ankle guard has an entire internal frame, not just the ankle joint covered with armor parts. There is a pull-action on the thigh’s internal frame but it doesn’t affect the thigh armors itself. The legs are held together by a part that is then connected to the waist.
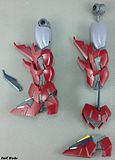
The assembly for the legs.

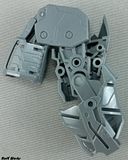
The leg’s internal frame articulation.
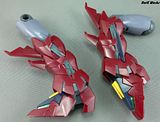
The leg’s actual articulation.

The foot’s “dragon head”.
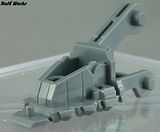
The internal foot detail, which shows the internal panel lines for the dragon’s “eyes”.

The dragon’s “upper palate”.
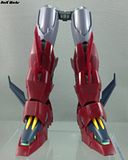
The legs with their connector.
Backpack:

The backpack of this kit is quite simple with no internal frame present. Two fins surround the thruster bells (which are originally not present with the mech’s original design). The side portions are used to connect the backpack to the wings, with a polycap surrounding the hole from the inside.

The top view of the backpack.
Wings:
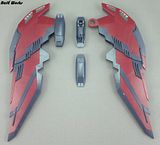
The wings of the kit. The wings itself are quite large, resulting the kit to be back heavy, but at the same time it supports the (standing) kit from falling backwards. Like the backpack, it also doesn’t feature any internal frame. A very unusual feature of this kit is its “pull to expand” function: the bottom tip of the wings must be pulled out in order to expand the wings to its widest area, the reverse is required to retract the wings. Unfortunately due to the wing’s half-and-half construction, there exists a long seamline on the “uncovered” edges of the wings, and it must be removed. The wings are connected to the backpack by an independent, two-part “wing connector”.


The expansion feature of the wing (an MG original).

The backpack with the wing connector (right side).
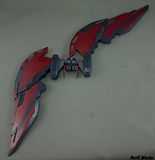

The wings’ articulation range.
Weapon and accessories:

Beam Sword:

Compared to a regular Gundam’s beam saber, the beam sword consists of a wider blade (as a result of a direct connection (through the use of an umbilical cable) to the main generator/reactor (as compared to a rechargeable E-Pac on a beam saber)) and therefore it can be said that it is more powerful than a beam saber. The beam sword consists of four parts: three parts for the hilt and the sword blade itself. The sword hilt mount consists of just two parts, and can be connected to either side skirt armor. The umbilical cable consists of a PVC-coated wire and a PS part, with the wire connected to the mount and the plastic part to the hilt tip. Since the hilt mount can be attached to either side skirt armors, the hilt can be also held at either hand, but preferably on one side only due to the wire imposing limited range poses for the beam sword. The hilt can be held securely on the hand due to a notch present on the hilt and a tab inside the hand.

The beam sword in storage mode.
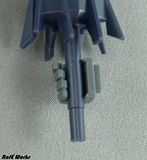
The hilt as attached to the manipulator.


The hilt mount as attached to the (right) side skirt armor.
Heat Rod:

The heat rod is composed of three different portions: the shield, the ten-segment whip, and a single-piece whip tip. The shield itself is composed of an internal part, the arm attachment part, the tail attachment part, and a ABS joint, followed by two armor parts. The whip segment is composed of an internal ABS hinge joint, followed by half-and-half armor pieces. All portions are connected through multiple ball joints, which makes the whip straight and stiff but can be each pulled out to become articulated. When this kit is transformed, this whole section becomes the dragon’s “tail”.

The heat rod’s assembly.
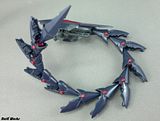
The whip’s articulation.

The shield with the “retracted” heat rod.


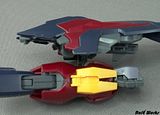
The shield’s arm connector, and as attached to the (left) arm.
Action Base 1 adapters:
This kit also includes two adapters for use with all variants of Bandai’s Action Base 1. These adapters are used separately depending on which mode it is in.
Pilot Figure:

All MG kits include a pilot figure in sitting and standing position, and this kit is of no exception.
PROFILE PICTURES:
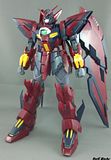
MS Front view:

MS Rear view:

Front view:
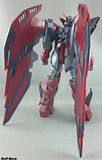
Rear view:
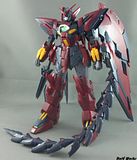
Fully-Equipped Front view:
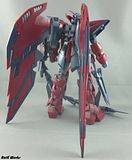
Fully-Equipped Rear view:
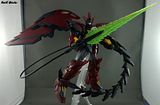
Various attack poses:


TRANSFORMATION:
Here are the necessary steps in order to transform the kit:
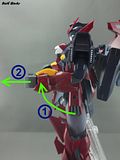
1. Bend the lower arm upward until it forms 90° with the upper arm.
2. Remove the hands and pull the claws forward.

3. Fold the rear skirt armors to their respective sides.
4. Dislodge the internal waist frame block.
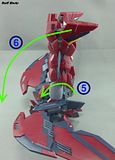
5. With the front chest portion (and the claws) laying flat on the ground, bend the internal waist block and the thighs to the front. Lock the center rear skirt portion to the backpack (position here).
6. Also bend the legs way towards the front.

7. Bend the foot and heel.
8. Open the “dragon mouth”.

9. With the whip at the right side, bend the arm attachment part to the right.
10. Bend the tail attachment part from the right all the way to the left.
11. Remove the (retracted) beam sword with the hilt mount from the side skirt armor and attach it to the exposed hole underneath the shield.
12. Close the rear skirt armors.
13. Pull the legs to extend, then bend the dragon heads slightly down.

14. Attach the Action Base 1 adapter (if the kit is to be displayed with the Action Base) into these holes.
15. Attach the tail connector into this hole.
Mobile Armor:


CONCLUSION:
As a former owner of the Epyon’s old 1:144 kit, I am truly impressed with this kit that got me to reserve it on HLJ as soon as I got the money to buy it with. Since the old HG 1:100 of this kit is basically just a scaled-up version of the 1:144, this MG kit is far more detailed (aside from the almost full-body internal frame, minus the panel-line overload on the HG), not to mention more detail on the MA mode (which actually looks more like a two-headed serpent with wings and claws due to its rather long tail). The dragon mouths are a decisive plus on this kit. Since the upper waist is not included in this kit, the resulting transformation is a stable one without the upper torso drooping down. Aside from those, this kit has some negative issues: the long seamline on the wing edges, somewhat flimsiness on the attached shield (not to mention that the heat rod cannot make upward poses due to the long whip), and the tail a little loose during the MA mode (which when removed while held on the stand will cause the stand pivot to fall down on the front (and wearing the gear-teeth-like locks) since the tail itself serves as a counterweight to the heavy front (the same principle that the tail functions as a counterweight for the MA mode also applies why the heat rod cannot be held on extreme poses). Also the upper arms may also detach due to the somewhat loose attachment to the upper arm joints. Overall, this is a great kit with minor flaws
Postscript note: Since an official variant of the Epyon exists, it is hinted that that variant will be released since it is basically a color scheme change and has different weapons.


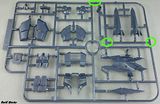
*Separation marks on the runners C1, D, and E around the parts for the weapons suggesting that the Epyon White variant may be released.
JUDGING CRITERIA: (Note: applicable criteria involved. 10 highest)
Construction: 8 out of 10 (almost no pre-paint modifications are needed, unless someone wants to seal the exposed seamlines on the wings)
Parts sealing: 3 out of 10 (there are some areas in which I believe looks good when sealed rather than leave them as-is as natural panel lines)
Foil sticker use: 1 out of 10 (only the eyes and sensors need the stickers)
Articulation: 9 out of 10 (as expected from an MG kit)
Detail: 10 out of 10 (very detailed kit, not over detailed even though Katoki designed the MG kit and decals/markings)
Quality vs. price: 8 out of 10 (got mine at about CA$77 from HLJ (others may charge higher or lower), that is pretty understandable for this kit)
Collectability rating: 8 out of 10 (very recommendable kit)
Rating formula:
[(Construction – Parts sealing – Foil sticker use + Articulation + Detail + Quality vs. price)/4 + Collectability rating (extra)]/2
KIT RATING:
7.9 out of 10

Scale: 1:100
Grade: Master Grade
MG #: 145
Series: Shin Kidō Senki Gundam Wing: Mugen no Warutsu (New Mobile Report Gundam Wing: Endless Waltz)
Release date: June 23, 2011
Price: ¥4,800 (inclusive of tax)
Number of Parts:
324 plastic parts
- 320 actual parts
- 175 Polystyrene (PS)
- 126 Acrylonitrile butadiene styrene (ABS)
- 19 Polyethylene (PE)
- 4 unneeded polycaps
foil stickers
marking seals
dry-transfer decals
PVC-coated, single-strand copper wire (of unknown gauge)
Total Number of Runners: 14 + polycaps
Polycap Number: PC-205BC
Approximate Plastic Colors:
Maroon Red, Very Dark Blue, Gray, Cool Gray, Yellow, White, Clear, Clear Green
Weapons and Accessories:
Beam sword x1 (hand-held with “retractable” feature; stored on holding rack on the side skirt armor when not in use)
Heat rod x1 (shield with integrated heat whip; mounted on the arm)
Hand manipulator set
1:100 scale pilot figure (sitting and standing)
Action Base 1 adapter
Gundam Wing Endless Waltz / Frozen Teardrop tankōbon (limited production for the kit’s initial production batch)
Kit Gimmicks:
Transformation to twin-headed dragon-type Mobile Armor mode
“Retractable” feature on the beam sword
Independent articulation for each whip and leg/dragon neck segments
Full-body internal frame
Pilot figure
“Pull to expand” feature of the wing
Swappable manipulator set
Ver. Ka-style markings
Compatibility with all variants of Bandai's Action Base 1 using the included adapters
HISTORY:
Based from the data of the OZ-00MS Tallgeese and the five “Operation Meteor” Gundams, Trieze Khushrenada created the transformable mobile suit OZ-13MS Gundam Epyon while under house-arrest by the Romefeller Foundation. Like its brother unit (and little known) OZ-14MS Gundam Aquarius, the Epyon was designed by Treize to realize his ideal of a “gentleman soldier”, but unlike the Aquarius (which was designed for his hatred of the mobile doll system) the Epyon was considered as the embodiment of Treize’s love for honorable duels. As such, the Epyon was outfitted with only close combat weapons: a reactor-fed, high-output beam sword, and a 10-segment heat whip integrated on its shield (collectively known as the “heat rod”). Aside from these two weapons, he also outfitted the mech with a so-called “Epyon System”: a modified Zero System which retains the same capabilities (including its hallucination-inducing effects) but requires a special helmet to be worn on the pilot’s head, a chest-mounted search eye which was the same type as the one used in the XXXG-01W Wing Gundam, and the ability to transform into a mobile armor mode which resembles a two-headed dragon.
After the Epyon was built, Treize hope that a capable pilot (specifically a Gundam pilot) would come forth and pilot the suit, until Wing Gundam’s pilot Heero Yuy came with the intention to assassinate Treize. Instead of assassinating Trieze, Heero accepted Treize’s offer to pilot the Epyon. After Heero boarded the mech, Treize warned him not to be a “winner” when piloting it, meaning that achieving victory must not on his mind, but only the fighting itself (probably a forewarning to the effects of the Zero/Epyon System). After hearing that Romefeller launched an invasion to the pacifist Sanc Kingdom ruled by Relena Peacecraft, Heero piloted the Epyon into battle but since he haven’t mastered the Zero System (this is the second time he piloted a mobile suit with the system), he suffered a near-nervous breakdown and fled the battle. After Relena’s brother Milliardo Peacecraft (formerly known as Zechs Merquise) arrived too late with his newly-acquired XXXG-00W0 Wing Gundam Zero to defend the kingdom, Heero (thru the Epyon System) mistook the Wing Zero as an enemy and fought themselves to a stalemate and ceased. After the battle the two exchanged their mechs with each other (for some unknown reason).
Sometime after Milliardo took and began piloting the Epyon, the Organization of Zodiac (OZ) splinter group called the “Treize Faction” was reformed as the “White Fang” (after their Luxembourg headquarters (and Treize’s residence) was destroyed by Romefeller) and claimed responsibility with defending the space colonies, their chief (and founder) Quinze (who actually took this as a golden opportunity to exact revenge on Earth for killing the late politician (and the original) Heero Yuy (Quinze was one of his foremost followers)) offered Milliardo the leadership of the group, noting that the White Fang needs a charismatic leader just like Treize before his was relieved as an OZ commander. Milliardo accepted the offer and continued to pilot the Epyon against the newly-established Earth Sphere Unified Nation (ESUN). During this time, the White Fang considers the five Gundams to be working under Romefeller/ESUN and therefore considers them to be an enemy.
At the final battle during the Christmas Eve War of A.C. 195, Milliardo flew the Epyon against the Gundam pilots, and later challenged Heero again for a re-match inside and around the captured Romefeller space battleship Libra. During this battle they reached another stalemate, until they reached one of Libra’s sections which was in the process of atmospheric entry. During their fight inside that section, Heero/Wing Zero manages to severe Epyon’s left arm, giving Heero a decisive win. As Heero prepared the Wing Zero to self-destruct to destroy the free-falling section, Milliardo convinced Heero to leave and he used the Epyon to destroy the section’s main reactor. Both Milliardo and the Epyon are presumed to be lost and missing/killed in action after the resulting explosion until Milliardo (as Codename “Wind”) resurfaces about a year later and the repaired Epyon during M.C. (Mars Century) 0022 – Next Winter (one Martian year = 1.8808 Julian/Earth years or approximately two years. The “Next Winter” indicates that it is winter on Earth during the second half of the Martian year.).
It is noted that the repaired Epyon during the events of Gundam Wing: Frozen Teardrop was piloted by a certain Major General Zechs Merquise (a nanobot replica of the original Zechs, complete with his memories), which is the leader of Mars’ Lanigreen Republic in a revolt against (the newly-reawakened) Relena’s Mars Federation. Also there is a second unit piloted by Chang Wufei (now known as the Preventer’s Master Chang) called the “Gundam Epyon White” (probable model number OZ-13MS/W) which sports a white and blue color scheme, is equipped with a dragon fang (which has a resemblance to the leg) and a beam trident (instead of its original weapons), and transforms into a three-headed dragon mobile armor (with the dragon fang as its center head and the beam trident as its tail).
PRELIMINARY REVIEW
Box art
Front:

The main box art is designed the usual way as with most other MG’s: the mech’s name and model number in a white-outline lettering on the leftmost edge, MG logo at the top right corner, the series’ trademark logo below the MG logo, and the Bandai logo at the bottom right corner. Below the series’ trademark logo is a note that a Frozen Teardrop tankōbon is included in the kit (for its initial production batch only) and the series’ main logo. The box CG art itself is done by Eto Koji (which depicts the mech and its MA form in the foreground, and the Wing Zero, Libra, and the Earth at the background) with the finishing touches done by Artpresto and Yam2.

The tankōbon mark and the Endless Waltz logo.
North side:


The north side of the box features the Endless Waltz MS design explanation, and the synopsis for both Endless Waltz and Frozen Teardrop. An image pose of the completed kit is present on the left side and the kit’s material and recycling, and illustration info’s as well as the kit’s barcode are present on the right.
South side:


The south portion of the box contains the front, rear, and MA view of the completed kit, as well as information on the different features of the kit.
West/East side:

This side is a simplified/compacted form of the box front, including a cropped version of the box art.
Box open:

Kit contents:

Runner A (PS):

Runner B (x2; PS):

Runner C1 (PS):

Runner C2 (a trimmed-down version of the C1; PS):

*Runner C2 on top of C1 showing the repeated parts:

Runner D (x2; PS):

Runner E (PS):

Runner F (PS):

Runner G (x2; ABS):

Runner H (ABS):

Runner I (x2; ABS):

*Indication arrows present on all ABS runners showing where to cut each part:

Polycap PC-205BC (PE):

Instruction manual and tankōbon:

Foil sticker, marking seals, and dry-transfer decal sheets:

PVC-coated copper wire and promo slip:

Manual:
Front page:

First used in the MG #137 XXXG-01D Gundam Deathscythe EW ver., the design for the front page of the manual uses a plain white image with the CG art of the mech on the box art as background, and the mech’s name and model number, and the series’, MG, and Bandai logos on the foreground.
MS Design page:

This page covers the information about the retconned mech designs used for the Glory of the Defeated manga (which was actually first used in the featured flashbacks in the Endless Waltz OVA/movie). Below this page is a story recap of the Epyon in the TV series.
Tutorials page:

This page covers the cutting, assembly, and the dry-transfer marking placement tutorials as well as the assembly order of the kit.


The cutting, assembly, and the dry-transfer placement tutorials.

The assembly order of the kit.
Assembly Index:


The assembly index of the kit, first located at the side of the tutorials page. Most regular MG kits has this index.
Parts List:


The parts list for the kit. This kit contains 15 runners all-in-all, plus the three detailing sheets and the PVC-coated wire. The tankōbon and the manual itself are not listed here. Below the second page is the parts order slip.
Spare Parts Order Slip:

The spare parts order slip, which is always located underneath the parts list page. This is a Japan-only service though.
Instruction manual first page:

The first page of the instruction manual. At the top of the page are assembly warnings and the assembly notifications required on this kit.
Assembly Notifications:

The assembly notifications of the kit, which must be followed while building the kit to ensure proper assembly. The grayed-out ones are not to be used.
Assembled section 3D view:

Located just before assembling a section, a 3D view of that section is displayed to show the builder what part is to be assembled.
Documentary Photographs:

This page contains the documentary photographs as described in the Glory of the Defeated manga, or basically the scenes from the TV series’ last episodes using the Endless Waltz mech designs.
Manga/Novel Synopsis:

Found below the documentary photographs page, this portion contains the synopsis for the Glory of the Defeated manga and the Frozen Teardrop novel. Pictured here are the front covers for the manga and the initial two tankōbons for the novel.
Model Data page:

This page covers the model data for the kit, including this kit’s history and as well as some features of the kit. Also pictured here are a CAD photo and a preliminary sketch during the kit’s design stage.
Transformation page:

This page illustrates the transformation process required for the kit to transform into its unique MA form.
Marking placement page:

This page shows the positioning of the different, Katoki-styled marking seals and dry-transfer decals to the kit. This page is also required when placing the optional water-slide decals when it becomes available.
Rear cover:

The rear page of the manual. Starting with the Deathscythe EW kit (and exclusive to all EW kits after it), the rear cover contains the front and rear views of the completed kit, as well as the color guide for the mech and pilot figure, and the panel-lining/detailing guide.
Color guide:


The color guide for the mech and the pilot figure. Uses the GSI Creos’ Mr. Color line. Underneath the mech’s color guide is a note for painting the ABS parts.
Detailing guide:

This page contains the information regarding how to detail the kit using Gundam Markers GM01-03.
Tankōbon:
Note: The tankōbon (according from Wikipedia) is “the Japanese term for a book that is complete in itself and is not part of a series (similar to a monograph), though the manga industry uses it for volumes which may be in a series”. Since this is a Japanese book itself, it is read from right to left. Also note that these photographs are used for this documentation only since this is a limited accessory.


MAIN REVIEW:
Note: Foil stickers are applied to this kit as directed by the manual. Any large seam lines present on the kit are the result of trimming the underlying male pegs for disassembly preparation, unless stated otherwise.
Body parts:
Head:


Like the MG #131 XXXG-01W Wing Gundam TV ver., the head contains an internal part, surrounded by the three-piece face and sensor plate, followed by a sideways half-and-half head armor construction, a separate forehead part, the head crest, and the v-fin. The ear fins are also separate parts. Two sensor-like circular detail are molded on the internal part and can be seen from the back. The head is connected to the body by a ball-and-socket joint (with the head containing the socket polycap).
Body:


The body section of the kit. This section contains the cockpit core, backpack attachment, the (now-standard) swiveling shoulder joints, and the search eye. The cockpit core is exactly the same as the Wing’s except for the latter’s main hatch attachment. The cockpit core is surrounded by more internal parts then by the armor parts. The armor parts consists of front and back armor pieces, as well as the cockpit hatch, collar, and a large piece below those armors. The backpack is connected to the body by a square polycap at the back.

The cockpit core of the kit.


The cockpit seat and module inside the core.


The opened cockpit hatch.
Arms:

The arm section of the kit and its assembly. This section consists of the shoulder armors, upper arm joint, upper arm, lower arm with the integrated arm claw and the elbow joint, and the swappable manipulator set. The shoulder armors itself consists of two internal parts, followed by four half-and-half armor covers and are bound together by three parts. The upper arm joint is quite similar with the Wing’s except for the latter’s “slide rail”. The upper arm is just a hollow part with an another small part attached to it. The internal part for the lower arm (and therefore the elbow joint) can be removed from the lower arm armor by removing the armor’s bottom part followed by the wrist cover and then the main armor. For some reason the wrist joint is not directly connected to the internal arm frame. The claw can be deployed by pulling the entire claw out from the arm. The arms do not use any polycaps except for the wrist joint.


The elbow’s articulation range.


The chest-to-shoulder joint’s articulation range.
Waist:


The waist section of the kit. The waist section is basically just a block of internal frame then covered by the crotch and the center rear skirt armors, followed by the articulated skirt armors. All six articulated skirt armors consists of an internal plating and covered by their respective armor parts, and are joined to the waist by their respective ball sockets. Due to the mech’s unique transformation mode, the frame block is articulated (and can be dislodged) for the legs to change position for transformation (held by two different clips when in MS mode). The waist is joined directly to the body by the use of a ball-and-socket joint (the waist has the ball portion) and to the legs by pivot joints (with a separate part containing the joint itself). For some reason this kit doesn’t have an upper waist portion, probably due to stability issues when transformed (although a separate, independent part acts as a cover for the body-waist joint).

The lower waist as viewed from underneath.


The waist’s internal frame block, when in the MS form and when fully extended.

The legs’ pivot joint.
Legs:


The leg section of the kit. Due to its role as a dragon’s “head” and “neck”, the legs itself is composed of two segment held together by a sliding joint, and the feet includes a dragon’s “mouth” for additional detail. Unlike the previous MG EW releases, this kit doesn’t have an independently-moving knee guard but its ankle guard has an entire internal frame, not just the ankle joint covered with armor parts. There is a pull-action on the thigh’s internal frame but it doesn’t affect the thigh armors itself. The legs are held together by a part that is then connected to the waist.

The assembly for the legs.


The leg’s internal frame articulation.

The leg’s actual articulation.

The foot’s “dragon head”.

The internal foot detail, which shows the internal panel lines for the dragon’s “eyes”.

The dragon’s “upper palate”.

The legs with their connector.
Backpack:

The backpack of this kit is quite simple with no internal frame present. Two fins surround the thruster bells (which are originally not present with the mech’s original design). The side portions are used to connect the backpack to the wings, with a polycap surrounding the hole from the inside.

The top view of the backpack.
Wings:

The wings of the kit. The wings itself are quite large, resulting the kit to be back heavy, but at the same time it supports the (standing) kit from falling backwards. Like the backpack, it also doesn’t feature any internal frame. A very unusual feature of this kit is its “pull to expand” function: the bottom tip of the wings must be pulled out in order to expand the wings to its widest area, the reverse is required to retract the wings. Unfortunately due to the wing’s half-and-half construction, there exists a long seamline on the “uncovered” edges of the wings, and it must be removed. The wings are connected to the backpack by an independent, two-part “wing connector”.


The expansion feature of the wing (an MG original).

The backpack with the wing connector (right side).


The wings’ articulation range.
Weapon and accessories:

Beam Sword:

Compared to a regular Gundam’s beam saber, the beam sword consists of a wider blade (as a result of a direct connection (through the use of an umbilical cable) to the main generator/reactor (as compared to a rechargeable E-Pac on a beam saber)) and therefore it can be said that it is more powerful than a beam saber. The beam sword consists of four parts: three parts for the hilt and the sword blade itself. The sword hilt mount consists of just two parts, and can be connected to either side skirt armor. The umbilical cable consists of a PVC-coated wire and a PS part, with the wire connected to the mount and the plastic part to the hilt tip. Since the hilt mount can be attached to either side skirt armors, the hilt can be also held at either hand, but preferably on one side only due to the wire imposing limited range poses for the beam sword. The hilt can be held securely on the hand due to a notch present on the hilt and a tab inside the hand.

The beam sword in storage mode.

The hilt as attached to the manipulator.


The hilt mount as attached to the (right) side skirt armor.
Heat Rod:

The heat rod is composed of three different portions: the shield, the ten-segment whip, and a single-piece whip tip. The shield itself is composed of an internal part, the arm attachment part, the tail attachment part, and a ABS joint, followed by two armor parts. The whip segment is composed of an internal ABS hinge joint, followed by half-and-half armor pieces. All portions are connected through multiple ball joints, which makes the whip straight and stiff but can be each pulled out to become articulated. When this kit is transformed, this whole section becomes the dragon’s “tail”.

The heat rod’s assembly.

The whip’s articulation.

The shield with the “retracted” heat rod.


The shield’s arm connector, and as attached to the (left) arm.
Action Base 1 adapters:
This kit also includes two adapters for use with all variants of Bandai’s Action Base 1. These adapters are used separately depending on which mode it is in.
Pilot Figure:

All MG kits include a pilot figure in sitting and standing position, and this kit is of no exception.
PROFILE PICTURES:
MS Front view:

MS Rear view:

Front view:

Rear view:

Fully-Equipped Front view:

Fully-Equipped Rear view:

Various attack poses:


TRANSFORMATION:
Here are the necessary steps in order to transform the kit:

1. Bend the lower arm upward until it forms 90° with the upper arm.
2. Remove the hands and pull the claws forward.

3. Fold the rear skirt armors to their respective sides.
4. Dislodge the internal waist frame block.

5. With the front chest portion (and the claws) laying flat on the ground, bend the internal waist block and the thighs to the front. Lock the center rear skirt portion to the backpack (position here).
6. Also bend the legs way towards the front.

7. Bend the foot and heel.
8. Open the “dragon mouth”.

9. With the whip at the right side, bend the arm attachment part to the right.
10. Bend the tail attachment part from the right all the way to the left.
11. Remove the (retracted) beam sword with the hilt mount from the side skirt armor and attach it to the exposed hole underneath the shield.
12. Close the rear skirt armors.
13. Pull the legs to extend, then bend the dragon heads slightly down.

14. Attach the Action Base 1 adapter (if the kit is to be displayed with the Action Base) into these holes.
15. Attach the tail connector into this hole.
Mobile Armor:


CONCLUSION:
As a former owner of the Epyon’s old 1:144 kit, I am truly impressed with this kit that got me to reserve it on HLJ as soon as I got the money to buy it with. Since the old HG 1:100 of this kit is basically just a scaled-up version of the 1:144, this MG kit is far more detailed (aside from the almost full-body internal frame, minus the panel-line overload on the HG), not to mention more detail on the MA mode (which actually looks more like a two-headed serpent with wings and claws due to its rather long tail). The dragon mouths are a decisive plus on this kit. Since the upper waist is not included in this kit, the resulting transformation is a stable one without the upper torso drooping down. Aside from those, this kit has some negative issues: the long seamline on the wing edges, somewhat flimsiness on the attached shield (not to mention that the heat rod cannot make upward poses due to the long whip), and the tail a little loose during the MA mode (which when removed while held on the stand will cause the stand pivot to fall down on the front (and wearing the gear-teeth-like locks) since the tail itself serves as a counterweight to the heavy front (the same principle that the tail functions as a counterweight for the MA mode also applies why the heat rod cannot be held on extreme poses). Also the upper arms may also detach due to the somewhat loose attachment to the upper arm joints. Overall, this is a great kit with minor flaws
Postscript note: Since an official variant of the Epyon exists, it is hinted that that variant will be released since it is basically a color scheme change and has different weapons.


*Separation marks on the runners C1, D, and E around the parts for the weapons suggesting that the Epyon White variant may be released.
JUDGING CRITERIA: (Note: applicable criteria involved. 10 highest)
Construction: 8 out of 10 (almost no pre-paint modifications are needed, unless someone wants to seal the exposed seamlines on the wings)
Parts sealing: 3 out of 10 (there are some areas in which I believe looks good when sealed rather than leave them as-is as natural panel lines)
Foil sticker use: 1 out of 10 (only the eyes and sensors need the stickers)
Articulation: 9 out of 10 (as expected from an MG kit)
Detail: 10 out of 10 (very detailed kit, not over detailed even though Katoki designed the MG kit and decals/markings)
Quality vs. price: 8 out of 10 (got mine at about CA$77 from HLJ (others may charge higher or lower), that is pretty understandable for this kit)
Collectability rating: 8 out of 10 (very recommendable kit)
Rating formula:
[(Construction – Parts sealing – Foil sticker use + Articulation + Detail + Quality vs. price)/4 + Collectability rating (extra)]/2
KIT RATING:
7.9 out of 10


 keeping the site active as a place to dump info for easier backtracking.