|
|
Post by JQ on Jan 16, 2008 6:29:36 GMT 8
thanks, thanks! your comments never failed to make me smile  sir JQ, much as i want to discuss the technique with you through words, allow me to accompany my answer with pictures to get the clear, uhm, picture  . saying that, i apologize if it will take me this weekend to reply on your query...  take your time, i'll just watch out for your reply about the technique. ;D |
|
|
|
Post by PilapZ on Jan 16, 2008 6:34:11 GMT 8
nice!  i admire your eye for detailing. hope to see more works amigo. ;D |
|
|
|
Post by 蠍座 shinn on Jan 16, 2008 8:19:48 GMT 8
anlupet! incredible work! |
|
|
|
Post by no3Ljm on Jan 16, 2008 9:56:26 GMT 8
so you paint it directly from the sprues? nice trick. so you primed first the sprues before painting them?
and small question on this internal frame of yours, are they all painted? or you just painted the details that you like? and if it's painted, did you paint the frame first before assembly or paint it when assembled? thanks in advance. looking forward to your next WIP posts.

happy painting!
|
|
raven55
DX Gashapon Super Robot

Posts: 137
|
Post by raven55 on Jan 16, 2008 10:10:58 GMT 8
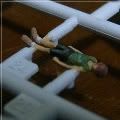
Whoa! Even the cockpit and Pilot?? Nice touch there, Sir! ;D
Love the flat paint as well. Ques re: your mark and scrape technique... do u scrape it with a sharp edge or sand it? And after that, you prime it?
Again, Kudos for a job well done, Sir! Sipag!!!!
|
|
|
|
Post by tagabukid on Jan 17, 2008 3:39:14 GMT 8
sir n0eljm: (disclaimer first: i am not an expert on this topic, so i will only answer you based on what i did/i am doing. you may follow my steps, and you may not... ) initial coat of plastic primer (as in first coat only, veeery thin) was applied to all pieces (except of cource the rubber parts) while still attached to their sprues. actually, prior to priming, i've soaked the plastic pieces in water with powdered detergent to remove the 'greasy' texture and hanged it overnight to dry... but not all parts are painted while on their sprues. exception are the parts that make up the 'externals' of the kits, where seamline-hiding is a must (for me). in this case i practiced 'test fitting' to see where a possible seamline must be addressed. take for example the chest part: a large gap required me to apply industrial epoxy (my cheap alternative for hobby putty) and let it cure overnight. when i was convinced the solution has dried and hardened, i sanded the excess epoxy to even the surface, then applied the second coat of primer (masking areas that need not to be primed, of course). the second coat of primer served as the gauge whether the kit was ready for the initial coat of dark blue by telling me if the seamline is still prominent or not. if not, i've moved on to spraying the initial coat of dark blue, let it dry for about 15 minutes, then spray the second coat. if i happened to apply the dark blue color while the chest parts were still on their sprues and while building noticed the unforgivable (lol) gap, imagine the amount of time and paint wasted, not to mention the kit since the paint will require stripping. in short (after a long explanation lol), the external parts where seamlines will be prominent were spared from being painted on their sprues, to give way for the epoxy/putty works, priming and sanding... yes, since the kit's internal frame parts were not spared by the initial coat of primer, the stock color was altered from plastic gray to white (because the primer that i used was white; no, the primer claimed to be gray but the actual result was white lol). what i did was handbrushed it with tamiya nato black (all internal parts not just the leg) and added tamiya chrome for accents. I even traced the panel lines with uni pen 0.1 marker. for this case, i've painted the internals while on their sprues, since seamline-hiding wasn't a must as the internals will be hidden by the externals... afterwards, i gave the internals a spray of flat clear for extra durability, especially in the areas that will be jointed (where paint-chipping are prominent). after letting the clear coat to dry for about an hour, i assembled the internals and satisfied with the result since the paint sticked to their parts even if the joints are moved (just don't be rough when posing your kits)... as it may have been known, kit building is one hell of a patience-tester - once you've engaged yourself in building a kit, temporarily take out 'rush' from your vocabulary. i have a message on my hobby table that says, "don't rush art." really, patience should be your ally, not your enemy... same here, looking forward to sharing to greattoys.net my (endless waltz) kits. hopefully, i'll have time this weekend to photoshoot them... |
|
|
|
Post by tagabukid on Jan 17, 2008 3:47:30 GMT 8
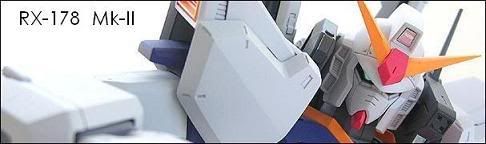
sir JQ promise, i won't make you wait longer than this weekend... sir PilapZ i consider my meticulous attitude a curse and a gift lol... thanks again sir shinn thanks, really thank you... sir raven55 yes sir, even heero yuy and his cockpit (have you seen my bakuc images? you may notice i even painted green on the cockpit to serve as heero's screen lol) were not spared. as i told sir PilapZ, i consider my meticulous attitude a curse and a gift... i'll respond to your question this weekend (same answer to that of sir JQs), please watch out for it... thanks for the nice words, guys... |
|
|
|
Post by tagabukid on Jan 17, 2008 10:39:09 GMT 8
allow me to share to you... Tools of the Trade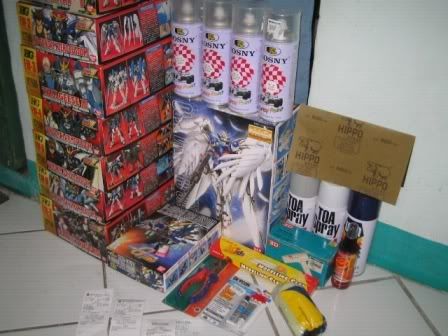 kit-building tools 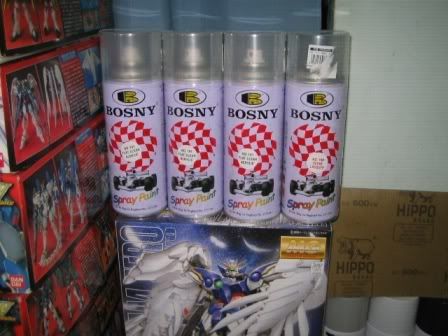 clear paint (top coat) galore - all of these are from my monita (i've had them on my wishlist last xmas lol) 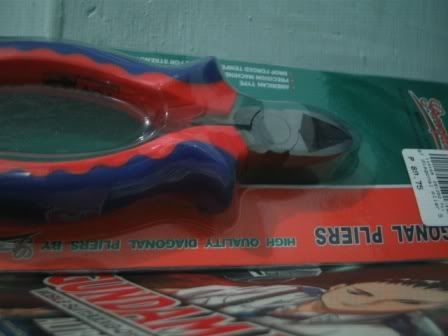 cheap alternative to hobby nippers - for only P90.00 =) 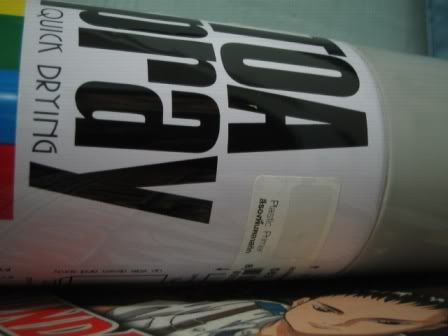 toa plastic primer  win dark blue spraycan... by toa lol[/quote] thanks =) |
|
|
|
Post by PilapZ on Jan 17, 2008 10:42:56 GMT 8
tools galore! ;D
|
|
|
|
Post by no3Ljm on Jan 17, 2008 10:53:34 GMT 8
thanks for the quick reply, bro. pro na pro sa explanation. love it.
yup, i remember the days (parang kelan lang yun ha.) when i used to do the same from washing the kits with detergent soap, paint it with spraypaints, and handbrush the details and panel lines. but due to work and personal stuff, i'm contented snap-building them for now.
but i still have plans painting them in the future. will just have to buy an airbrush set first.
again, thanks for sharing your method, bro. it will help a lot of Gundamers here at the boards. kudos bro!
|
|
|
|
Post by tagabukid on Jan 17, 2008 10:54:05 GMT 8
to sir sir n0eljm and fellow gundammers, here's another bit of my worklog, basically the "photo version" of the steps i mentioned above: 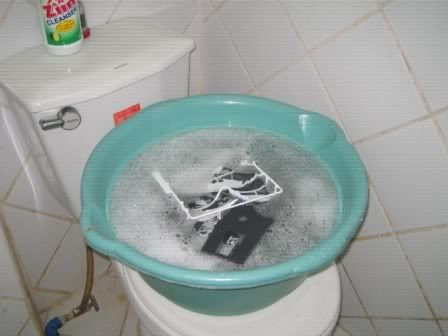 soak to remove the mold-ejection grease... 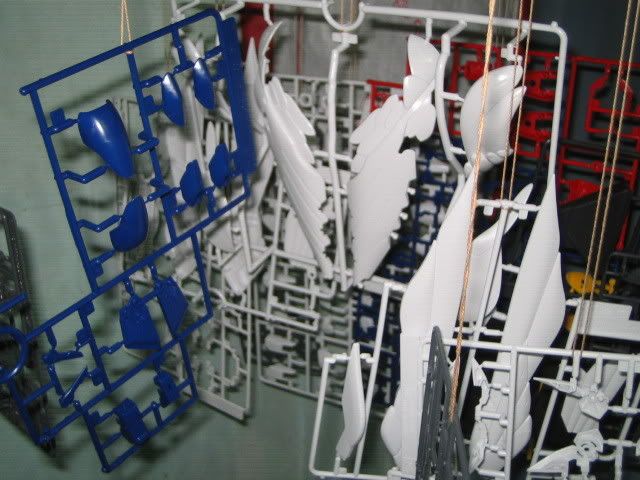 hang overnight to dry... 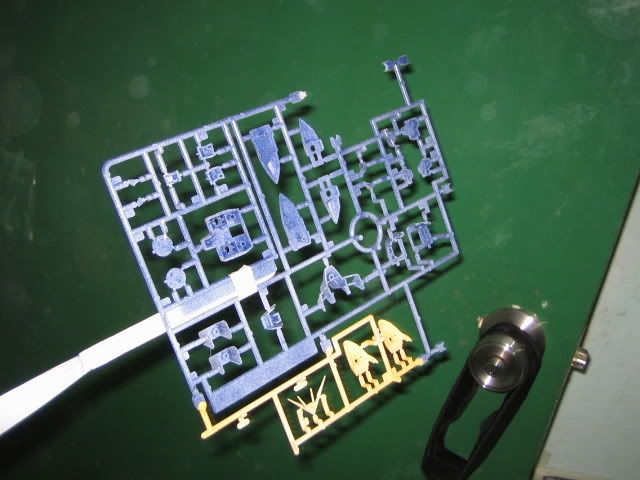 initial coat of primer (applied to all plastic parts)... 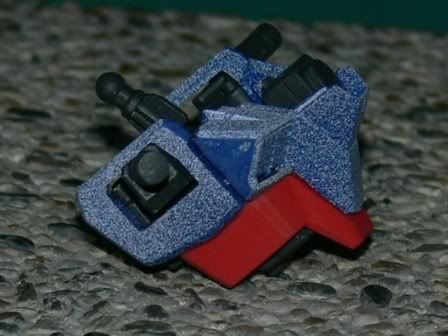 test fitting (note the gap)... 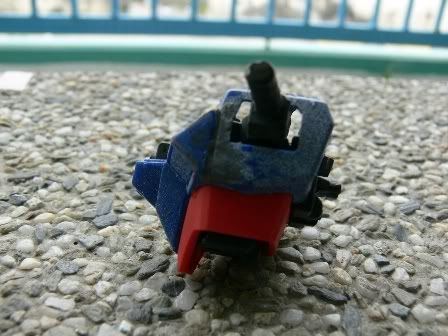 applying industrial epoxy for filling... 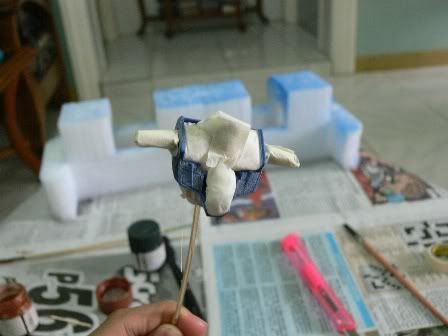 masking of unaffected areas before the second priming (tip: clay is a good and flexible masker )... 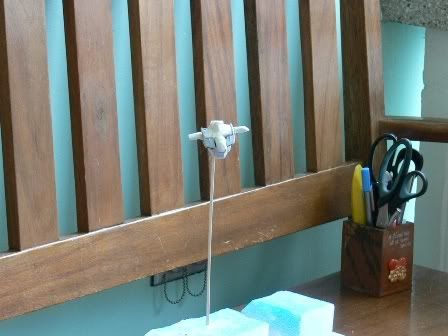 application of second coat of primer.... i'm still searching for the end result, will post it here as soon as i found it. hope this helps... |
|
|
|
Post by tagabukid on Jan 17, 2008 11:04:01 GMT 8
ah, here it is... 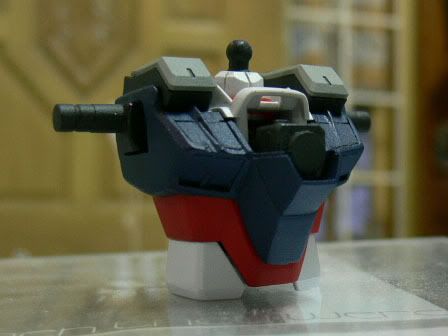 gap no more... well, that's all for today, got to get some sleep... two more days and my night shift will be over... |
|
|
|
Post by qb on Jan 17, 2008 11:47:13 GMT 8
Question(s) ! ;D You use epoxy for sealing instead of cement? Do you close the part fully after you apply the epoxy, then mask and then paint?
btw, is clay reusable as a mask and doesn't leave a sticky feeling to the kit? TIA! ;D
|
|
raven55
DX Gashapon Super Robot
Posts: 137
|
Post by raven55 on Jan 17, 2008 13:43:34 GMT 8
Thanks for indulging us with our questions, Sir!
You are indeed MASIPAG! ;D Love the way you work! Keep it up sir!
|
|
|
|
Post by PilapZ on Jan 17, 2008 14:04:49 GMT 8
modeling 101! ;D thanks for the tips amigo. |
|


 .
.